Accessing Chat
1
Log in to Prisme.ai
Access your organization’s Prisme.ai instance using your credentials.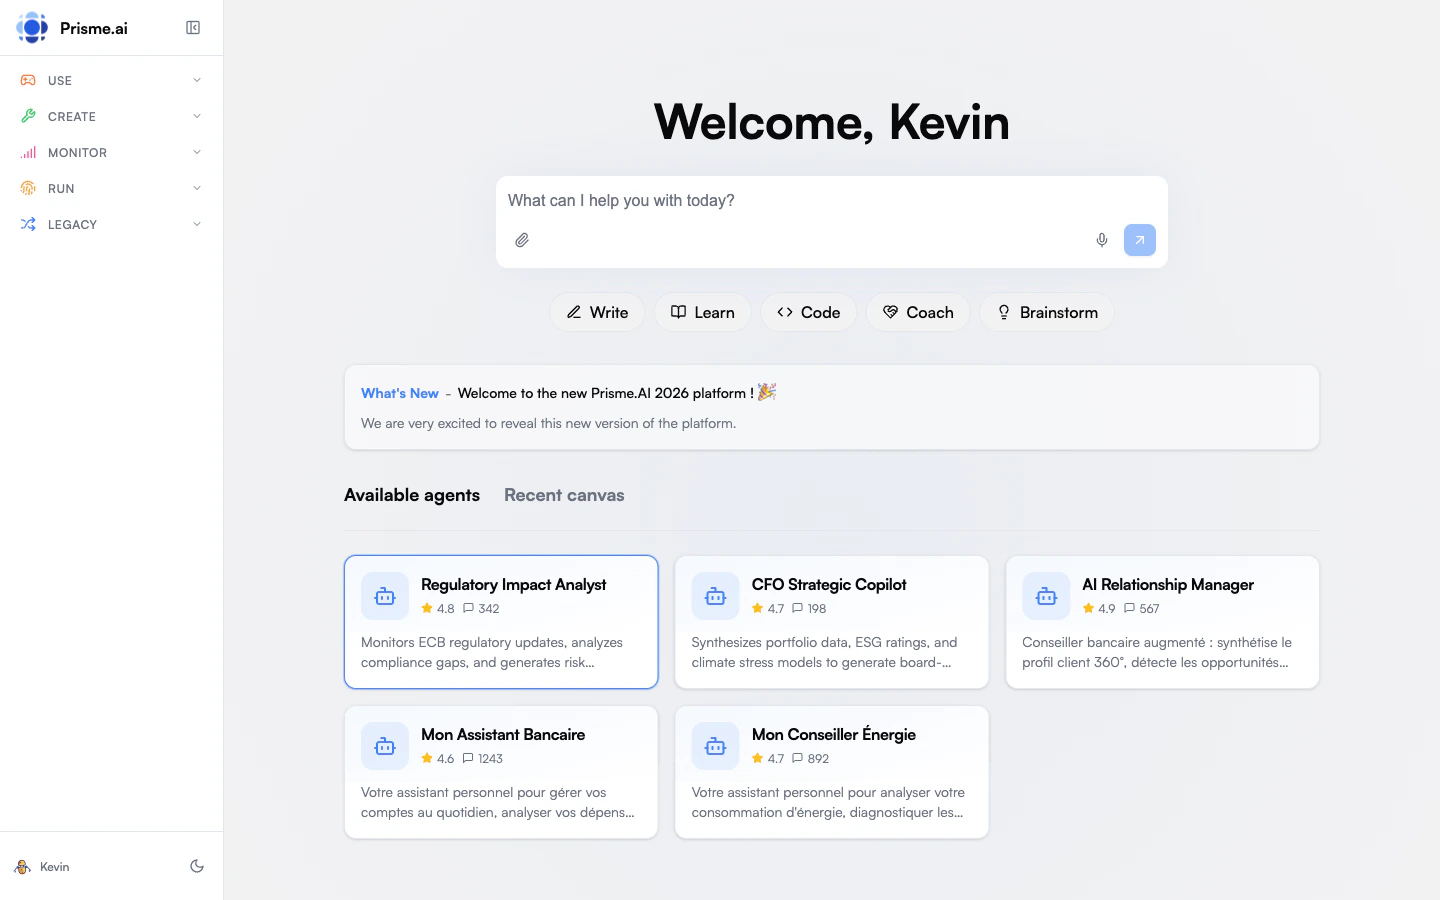
2
Navigate to Chat
In the sidebar, expand the Use menu. You’ll see two options: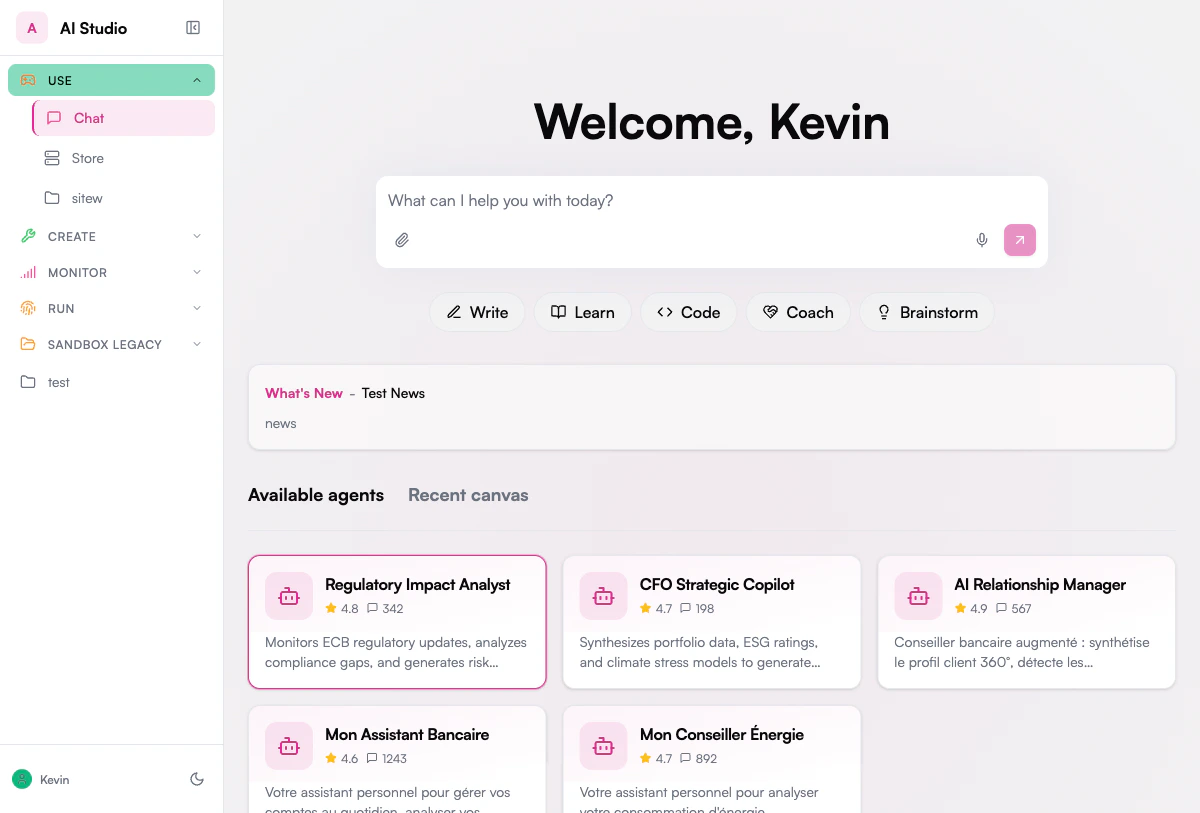
- Chat - Start conversations with AI agents
- Store - Discover and browse available agents
3
Explore the home screen
The Chat home screen shows:
- A welcome message and input box
- Prompt categories - Quick-access pills to browse ready-made prompts
- Available agents - Agents shared with you
- Recent canvas - Your recent content creation work
- News - Updates from your organization
Understanding the Interface
Let’s explore the key elements of the Chat interface: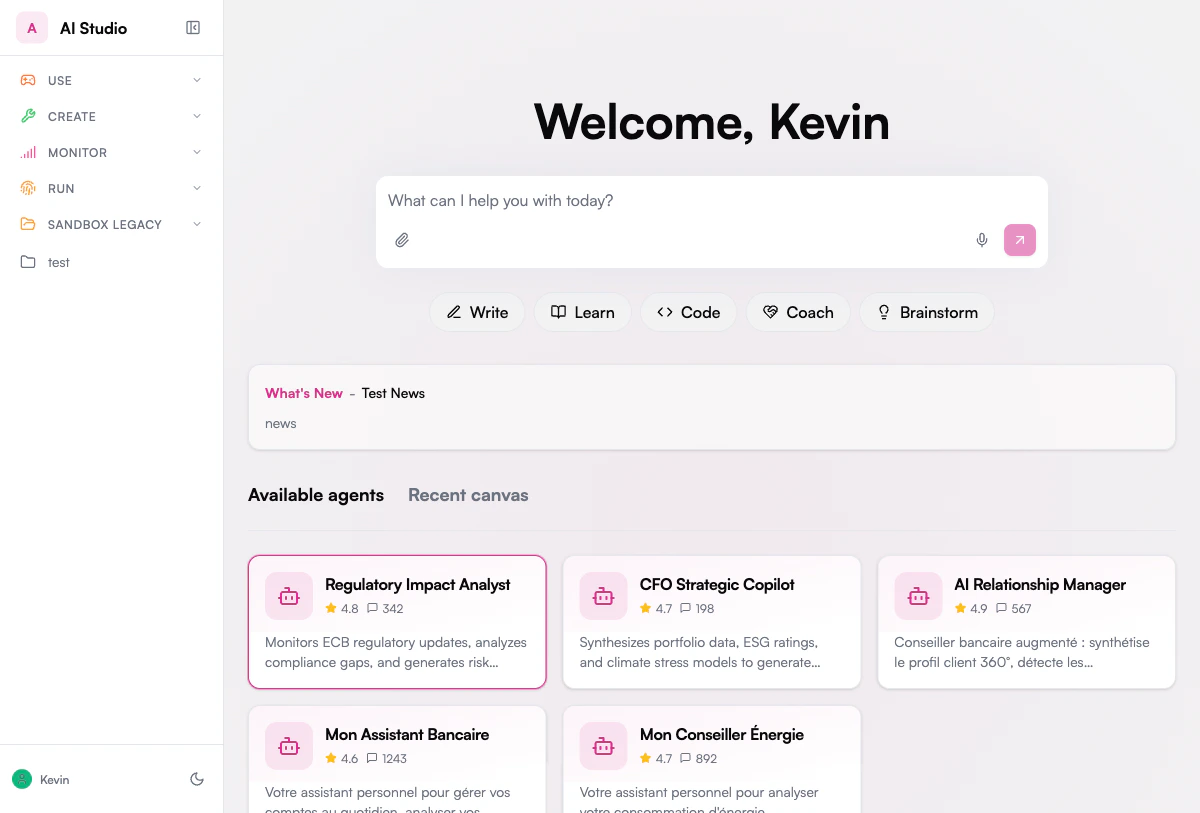
Chat Home Screen
When you open Chat, you’ll see:- Welcome message - Personalized greeting with input box
- Available agents - Agent cards you can click to start chatting
- Recent canvas - Quick access to your recent content work
- News section - Updates from your organization
Conversation View
When chatting with an agent:- Agent sidebar - List of agents and your conversation history
- Model selector - Choose which AI model to use (top of chat area)
- Message area - Your conversation with the agent
- Input box - Type your messages
- Attach file - Upload documents to analyze
- Tools - Access agent capabilities
- Dictate - Use voice input
- Send - Send your message
Your First Conversation
Let’s start a basic conversation with Chat:1
Ask a question
Type a question or request in the input box and press Enter or click the send button.Example questions to get started:
- “Can you help me draft an email to my team about our upcoming project deadline?”
- “Summarize the key points about Retrieval Augmented Generation.”
- “What are some best practices for effective virtual meetings?”
2
Review the response
The AI will generate a response based on your question. The response will appear in the message area.You’ll see the response appear in real-time as it’s being generated.
3
Continue the conversation
Follow up with additional questions or requests. Chat maintains context throughout your conversation.Example follow-ups:
- “Can you make that more concise?”
- “Add a section about [specific topic].”
- “Rewrite this in a more formal tone.”
Working with Documents
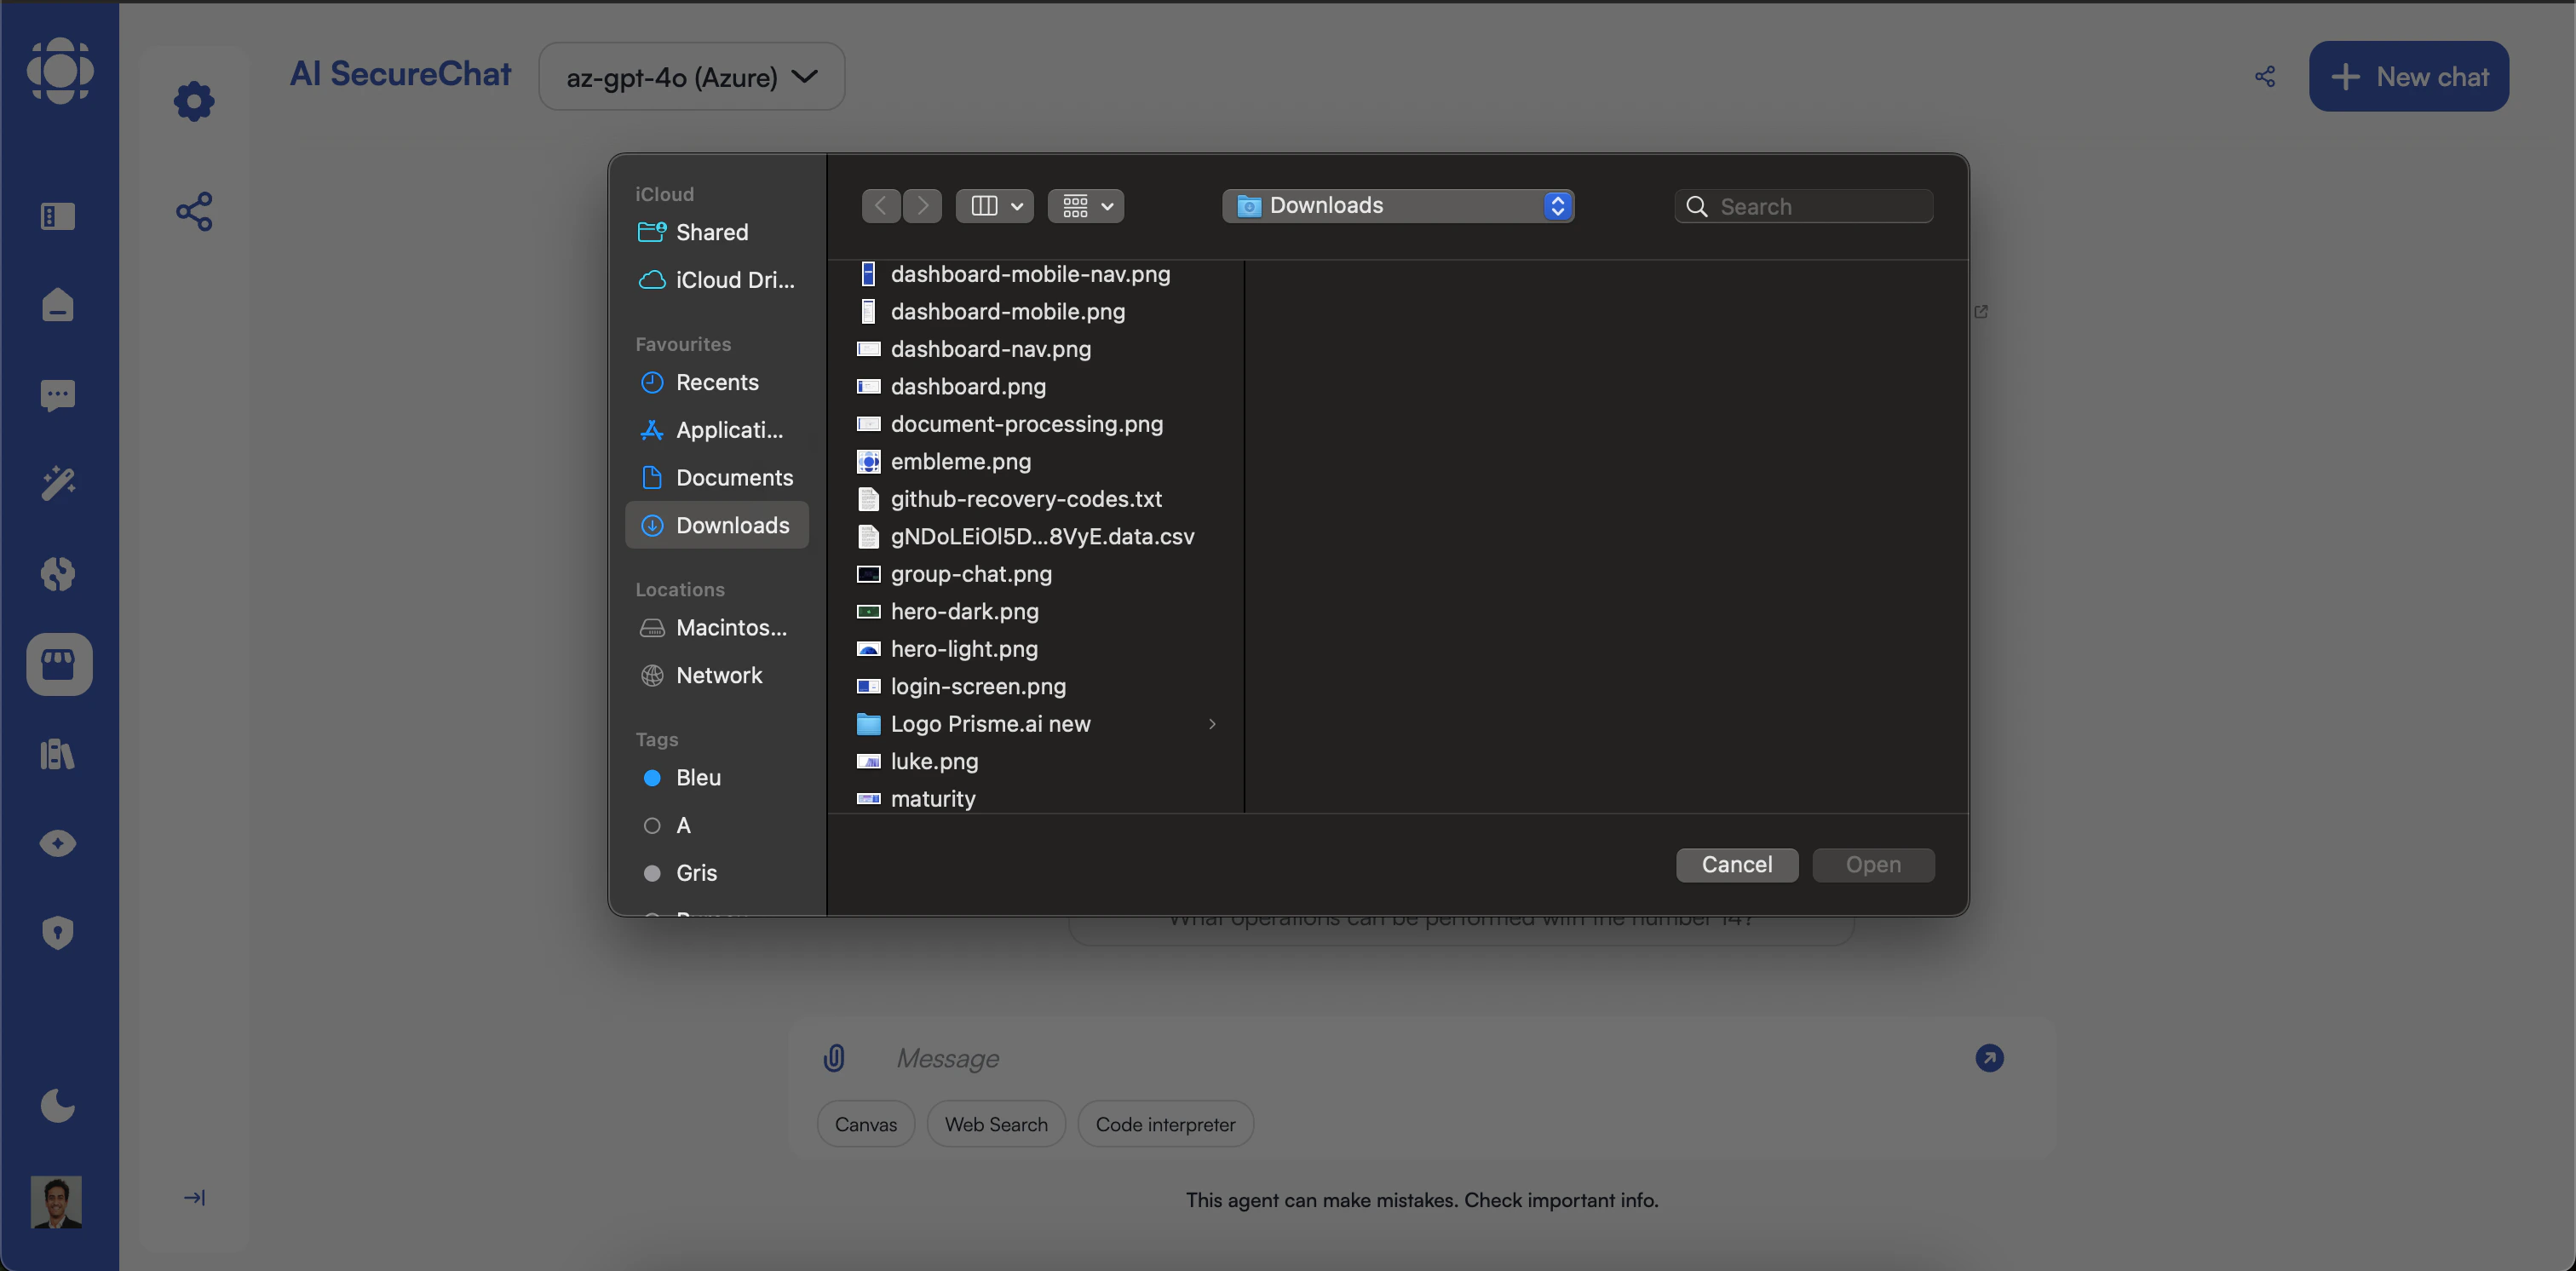
One of Chat’s powerful features is the ability to analyze documents:1
Upload a document
Click the upload button (📎) next to the input box and select a document from your computer.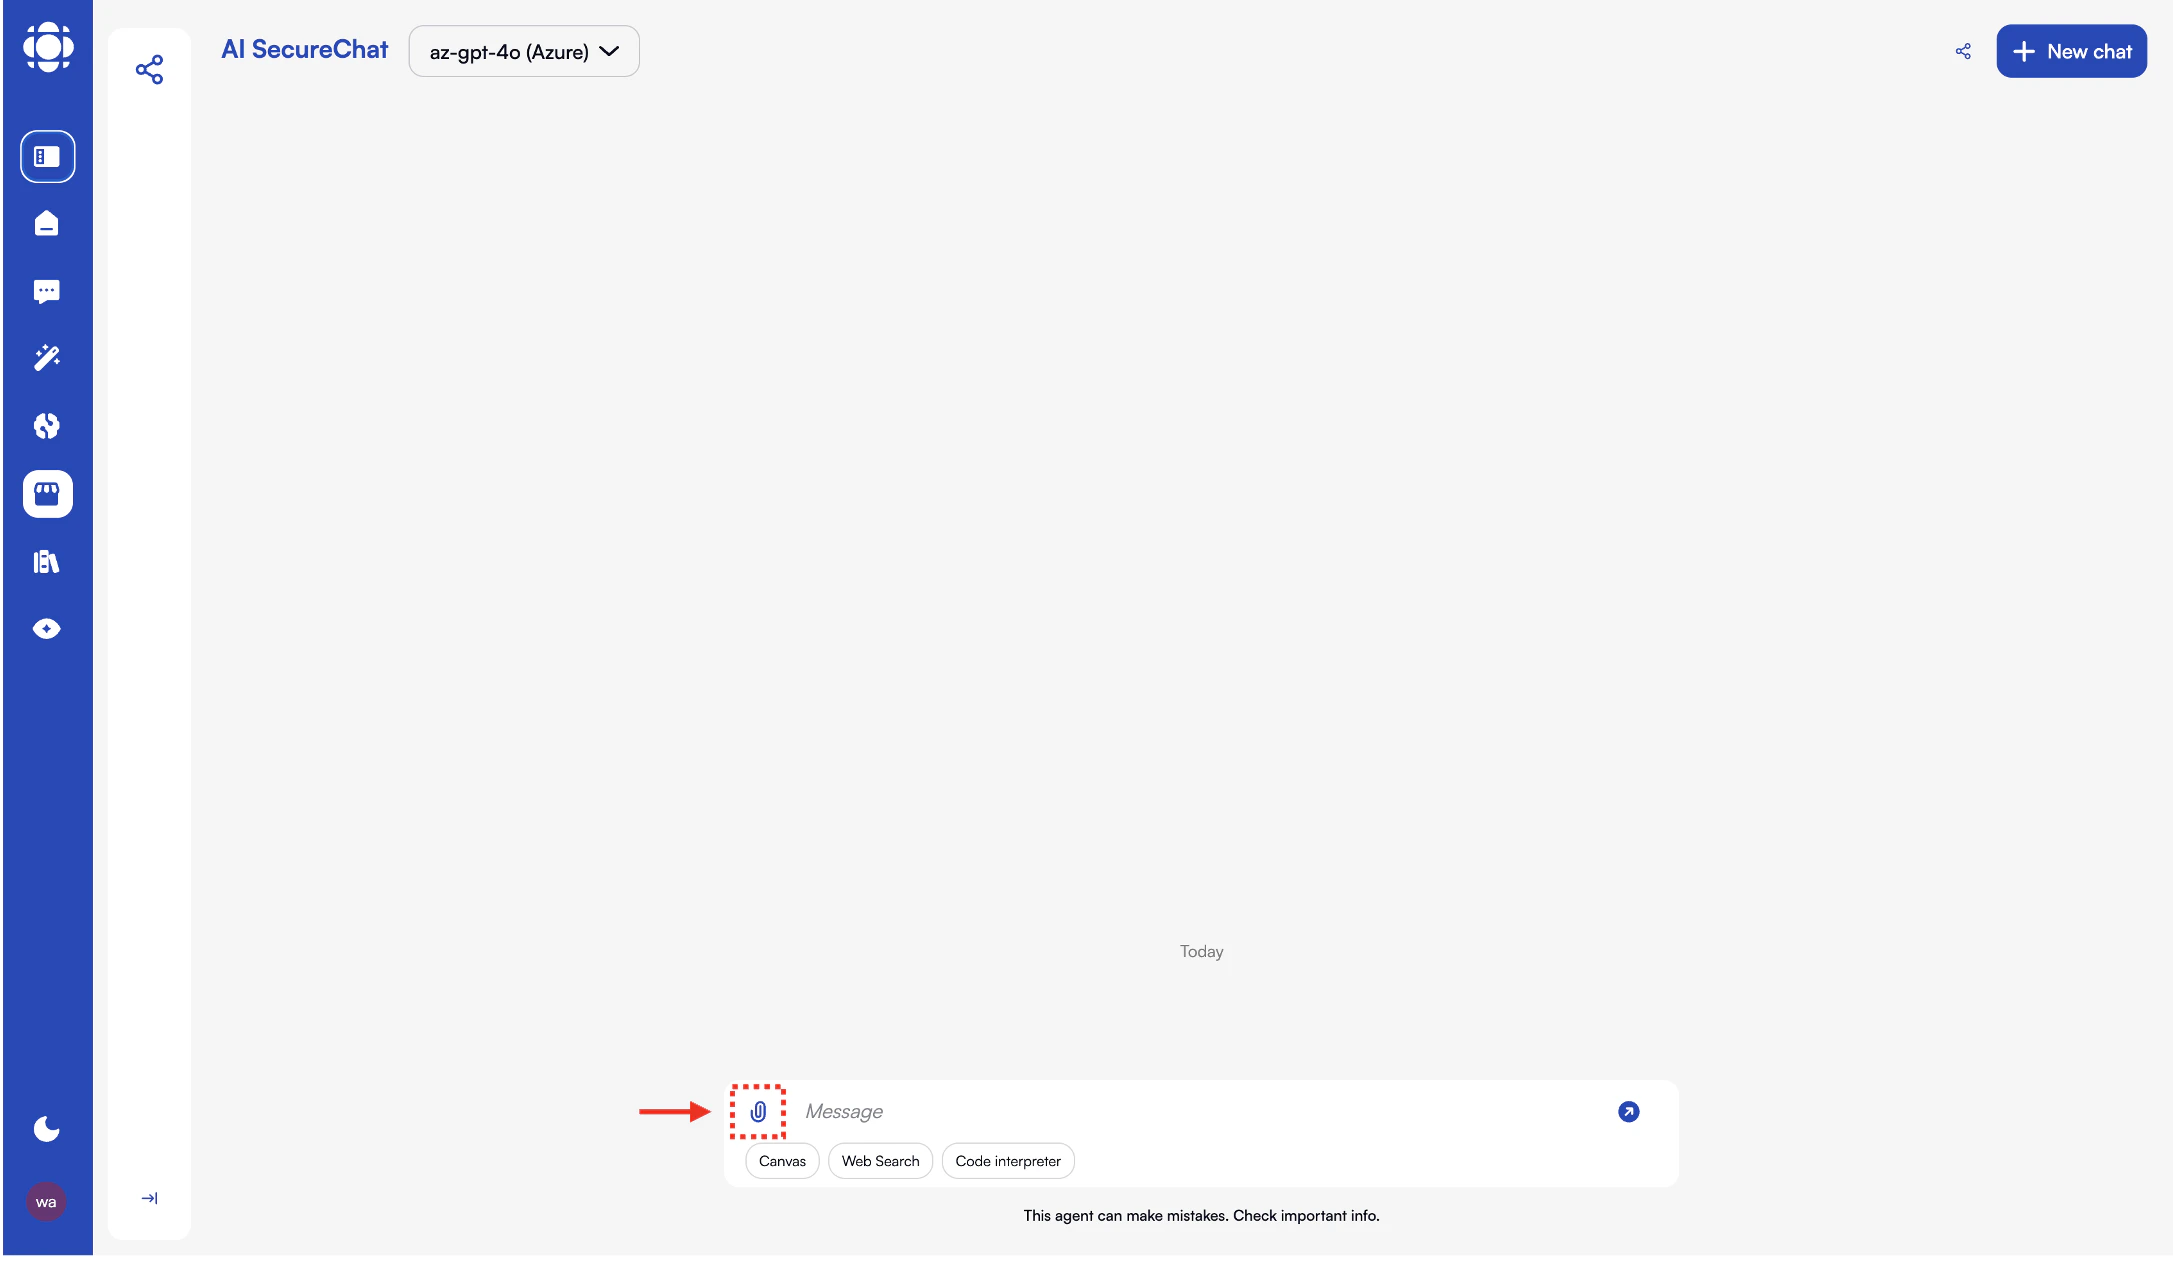
2
Wait for processing
The document will be uploaded and processed. This may take a few moments depending on the document size.You’ll see a progress indicator while the document is being processed.
3
Ask questions about the document
Once processing is complete, you can ask questions specifically about the document content.Example document questions:
- “Summarize the main points of this document.”
- “What are the key findings in the results section?”
- “Extract the action items from this meeting note.”
- “What data is shown in the table on page 3?”
Managing Conversations
Keep your Chat experience organized:1
Start a new conversation
Click the ”+” button in the conversation sidebar to start a fresh conversation.Starting a new conversation clears the context from previous interactions.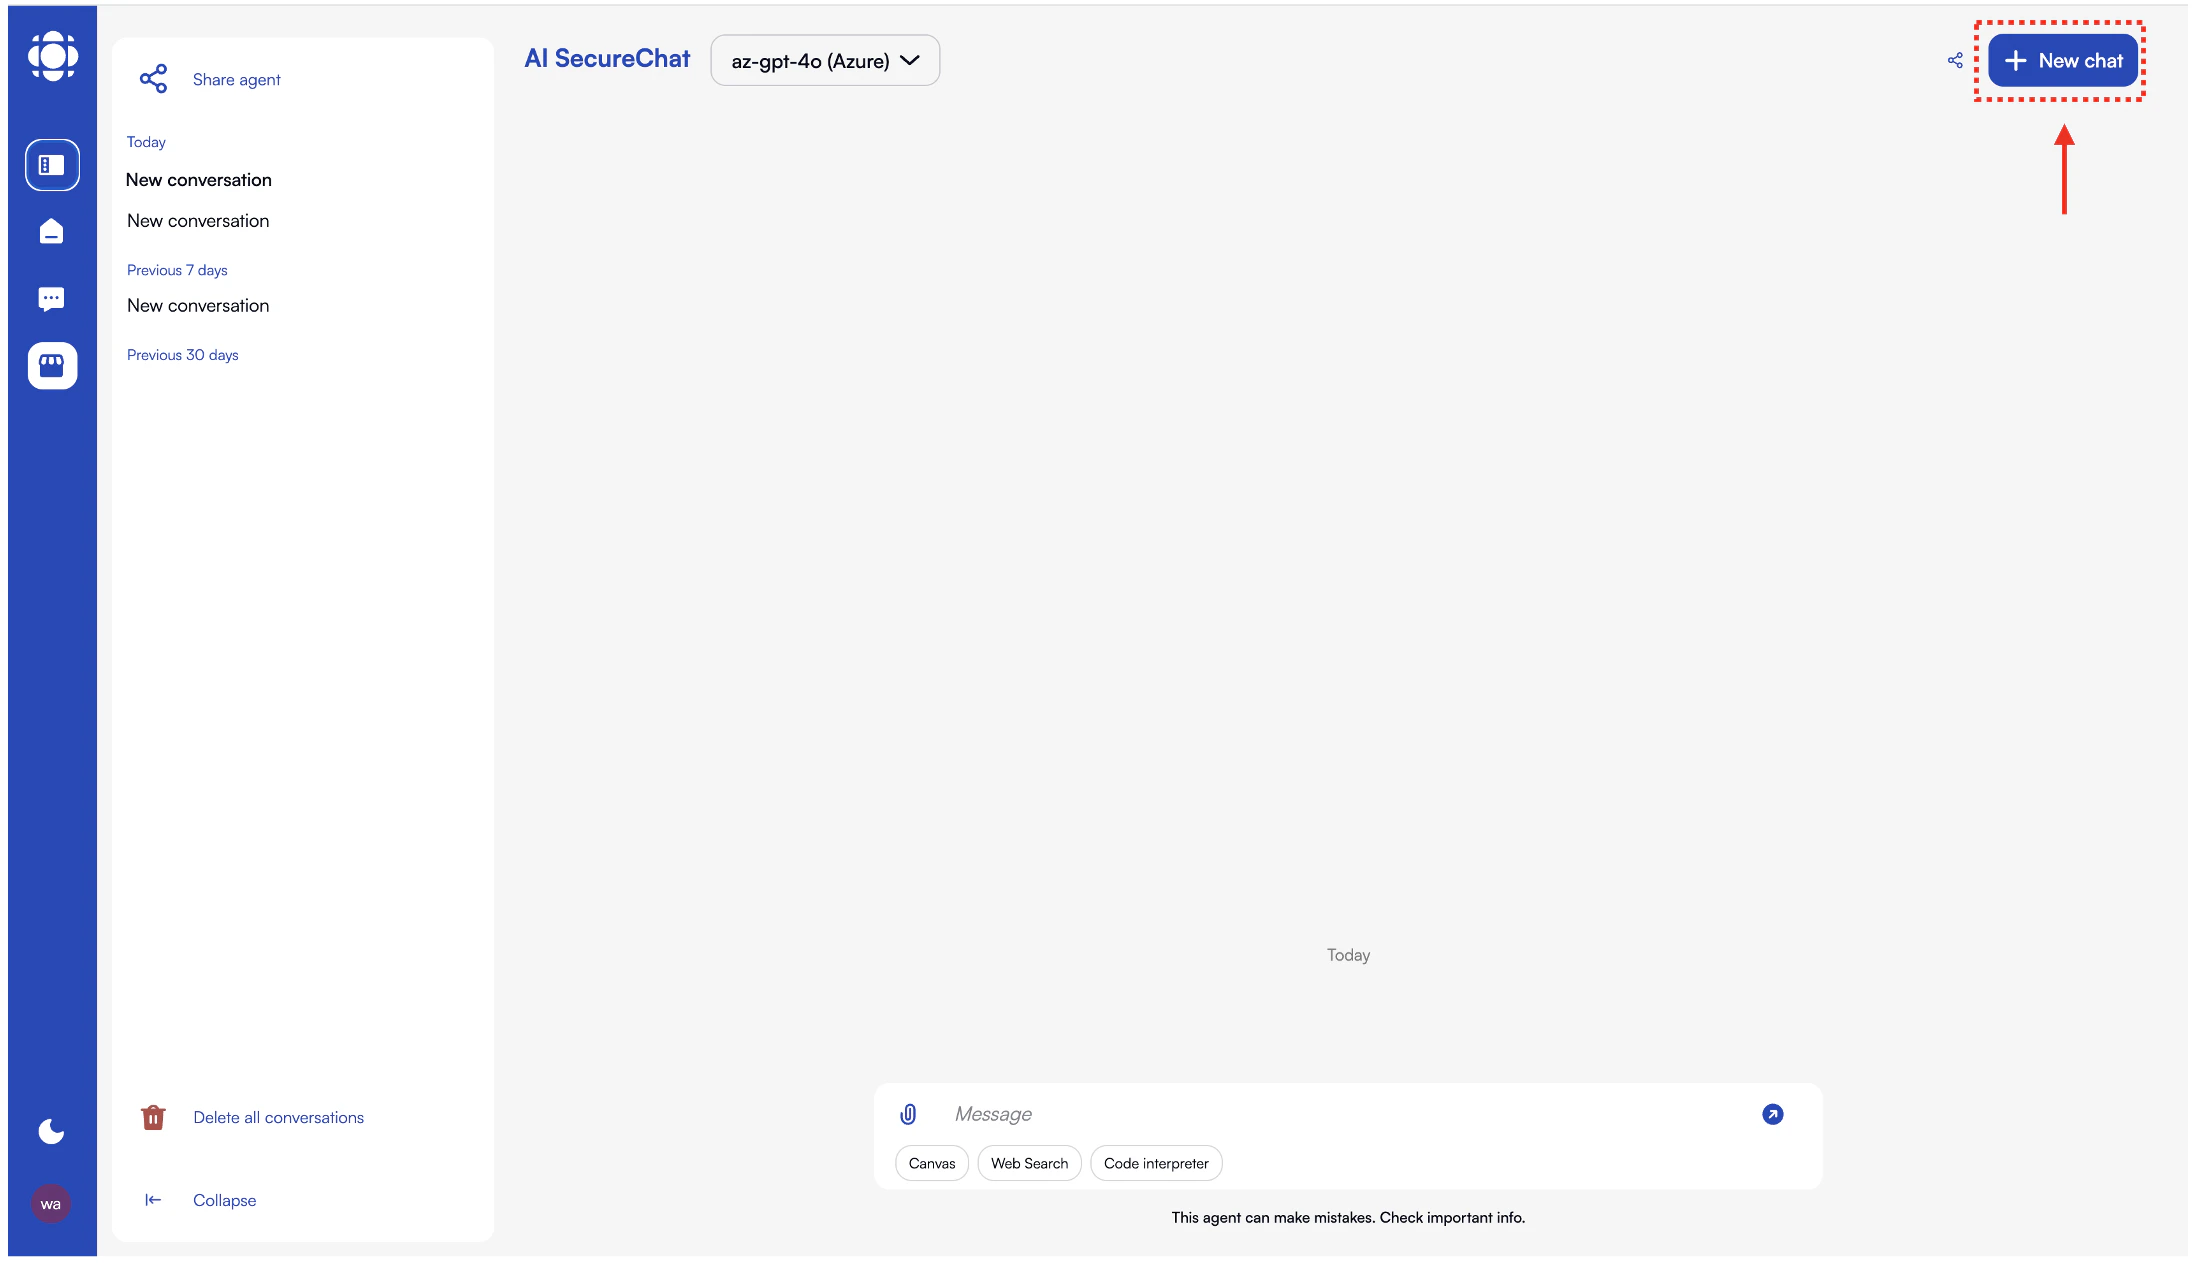
2
Name your conversation
/Click on the default conversation name (“New conversation”) at the top of the message area to rename it.Use descriptive names that help you identify the conversation topic.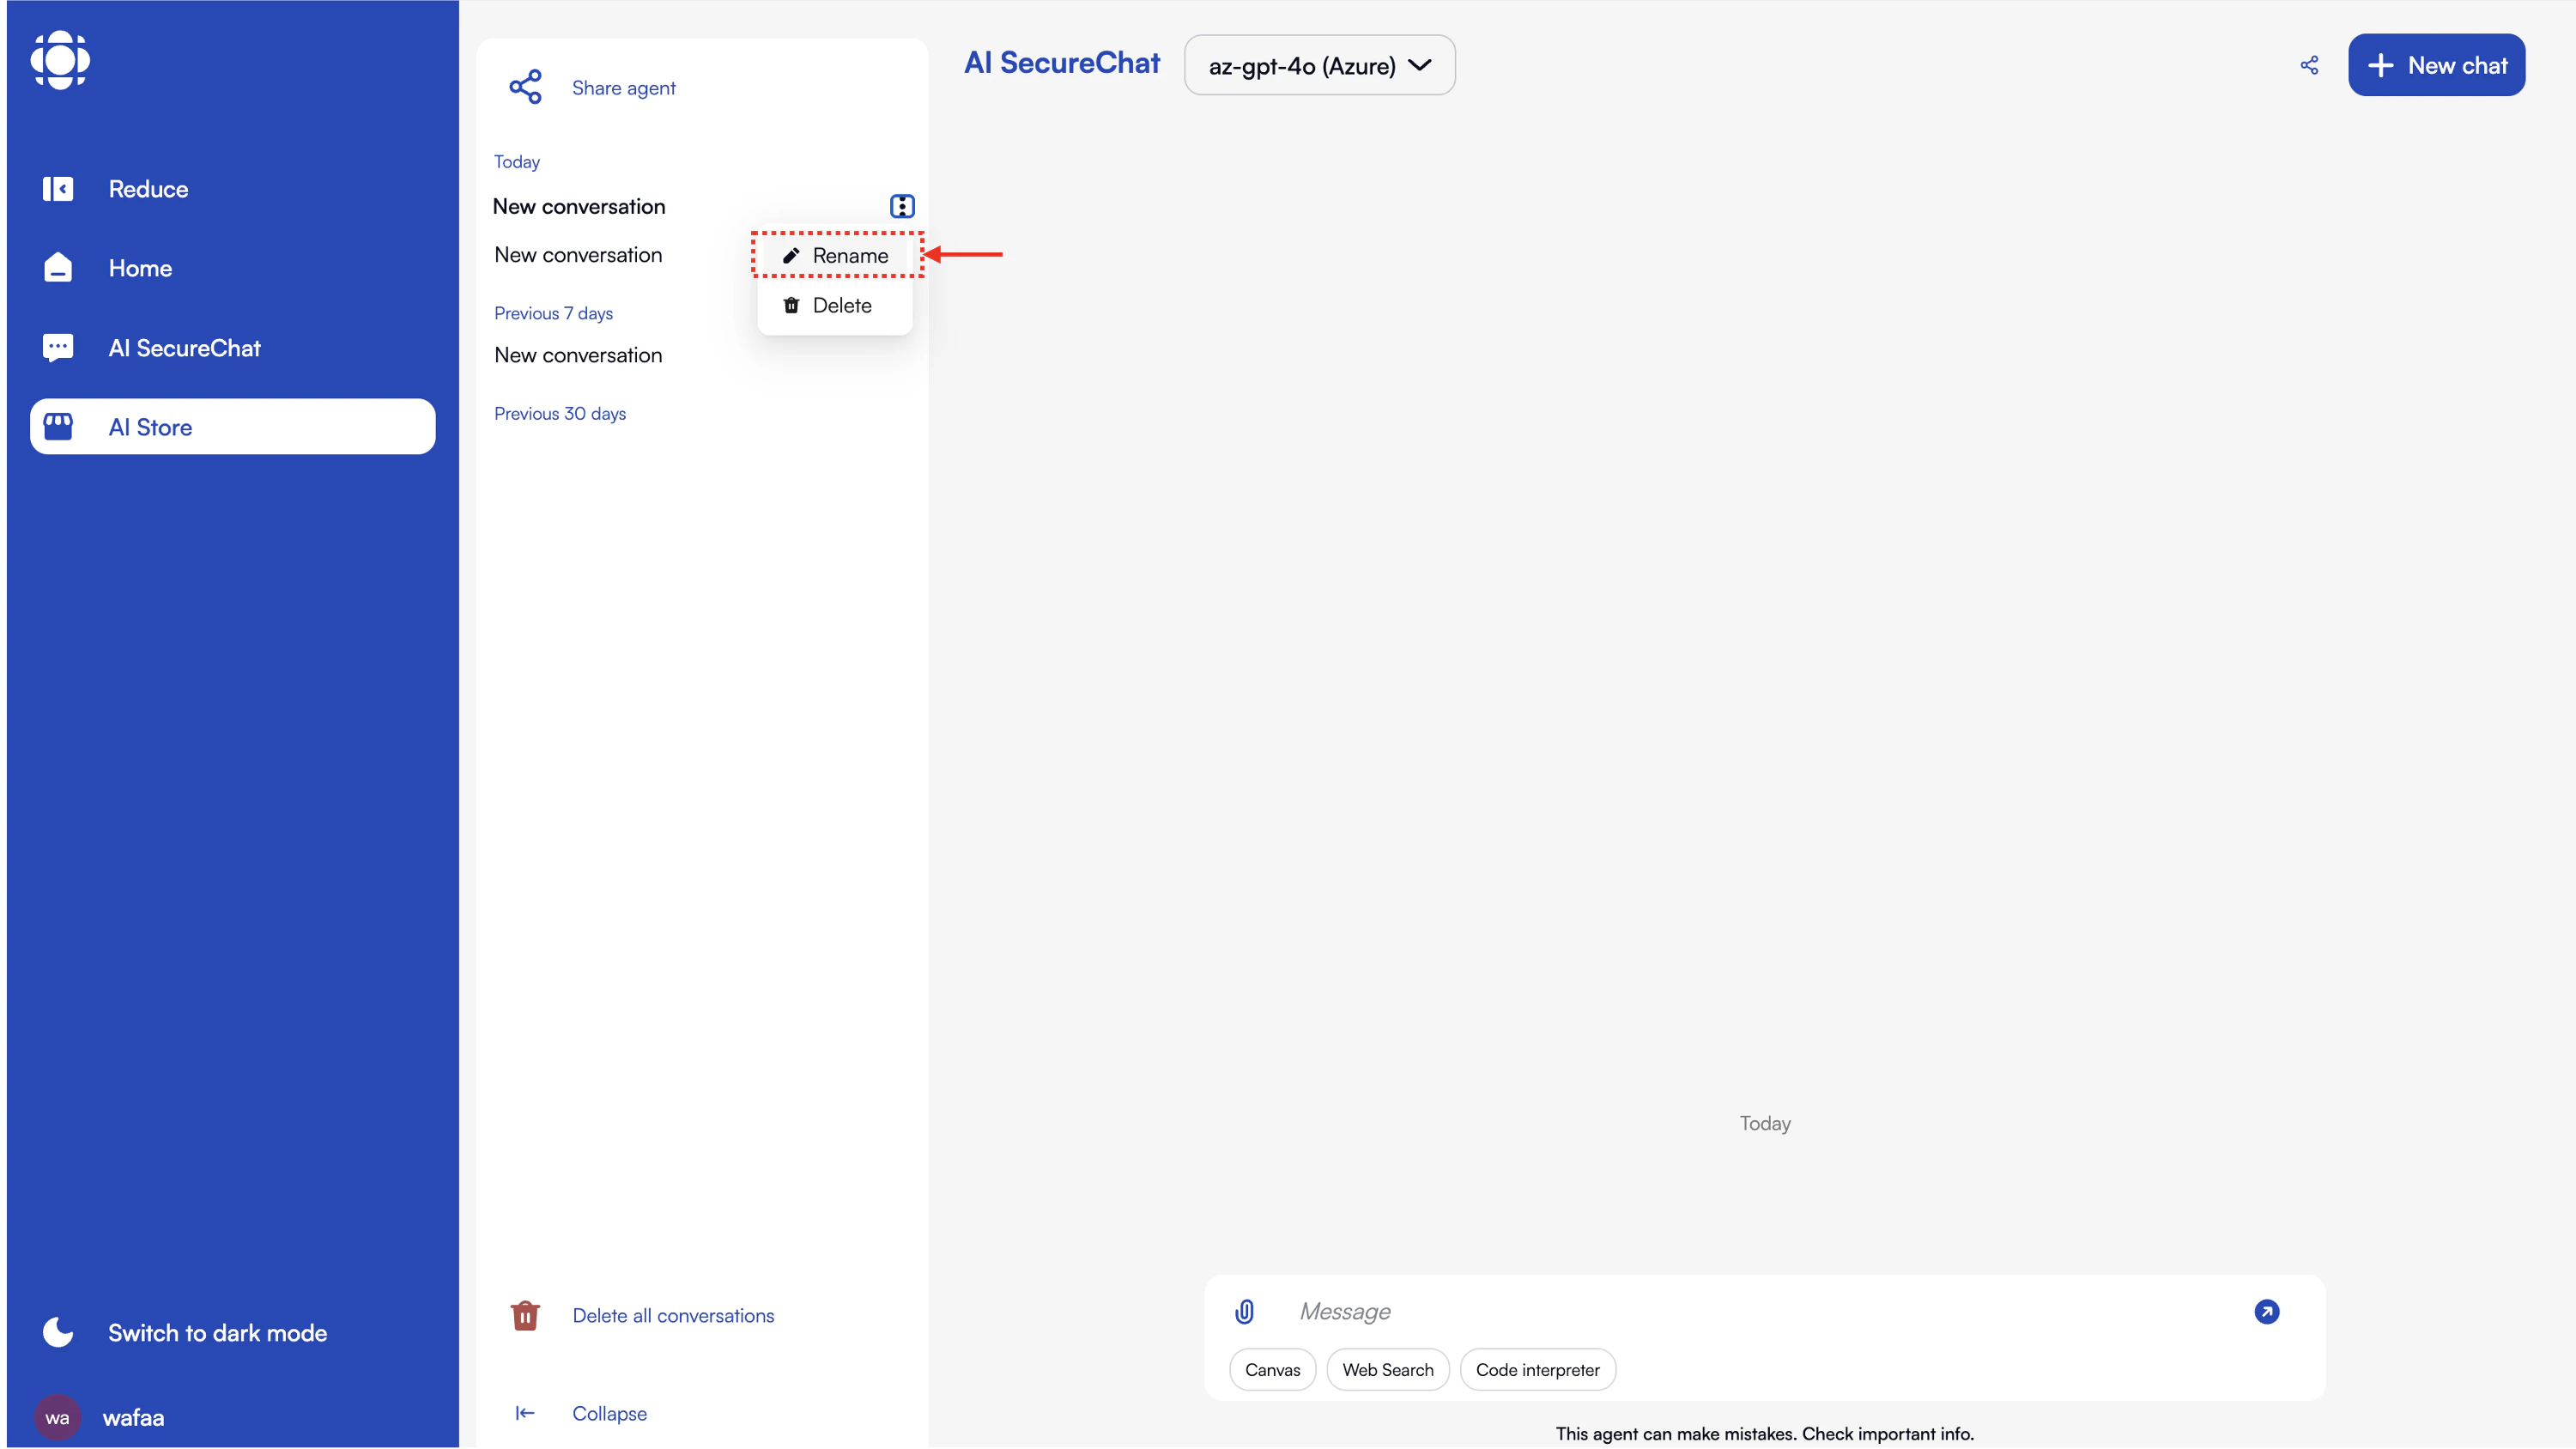
3
Access conversation history
Browse your previous conversations using the sidebar navigation.Conversations are automatically saved and can be accessed according to your organization’s retention policies.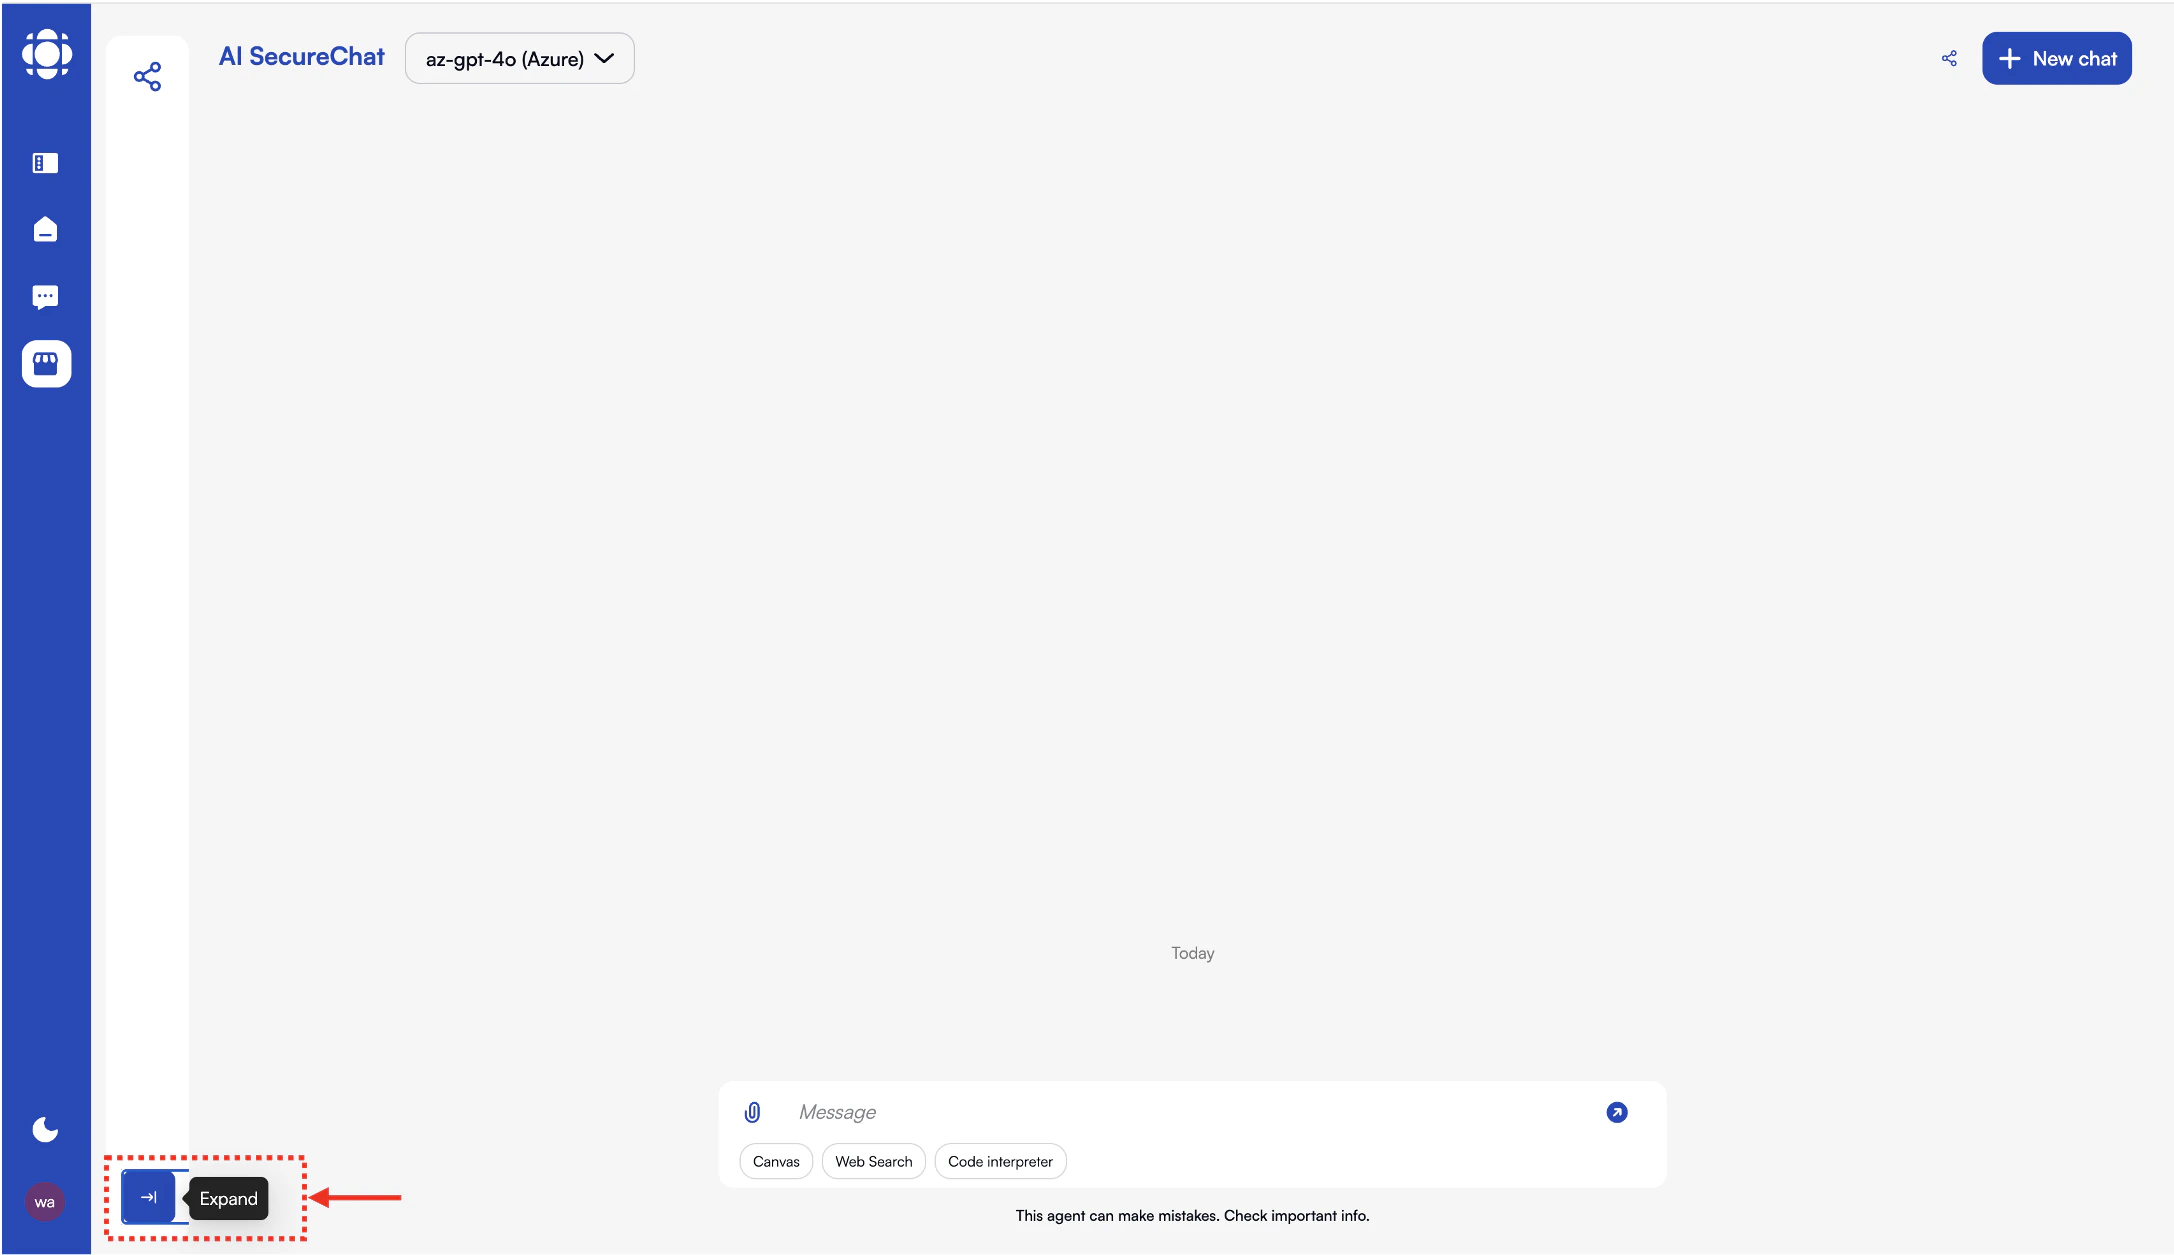
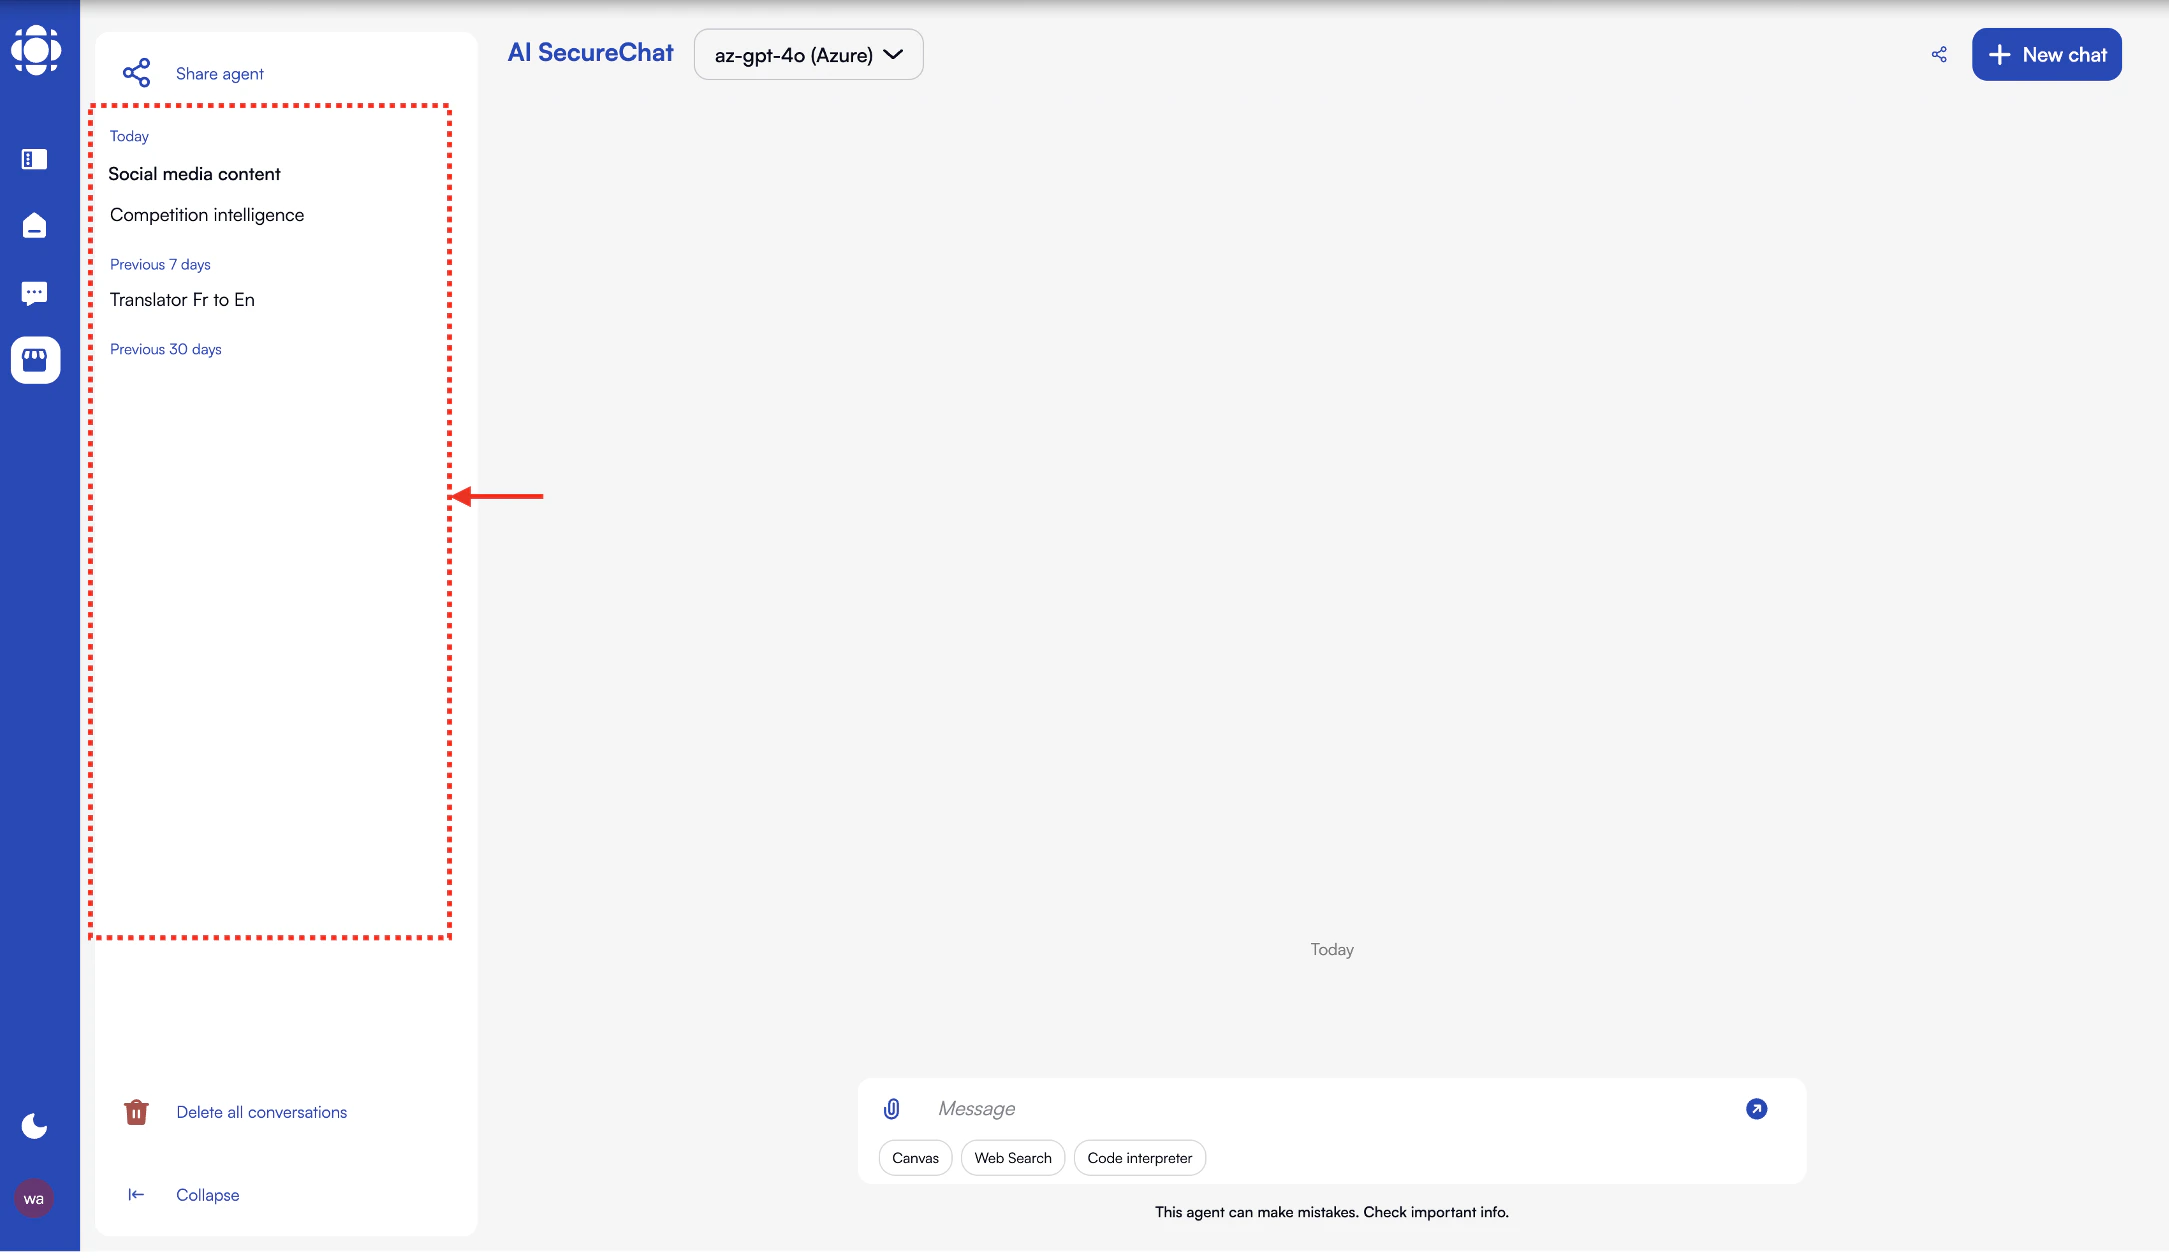
4
Delete a conversation
Hover over a conversation in the sidebar and click the delete icon (🗑️) to remove it.Depending on your organization’s settings, deleted conversations may be recoverable for a certain period.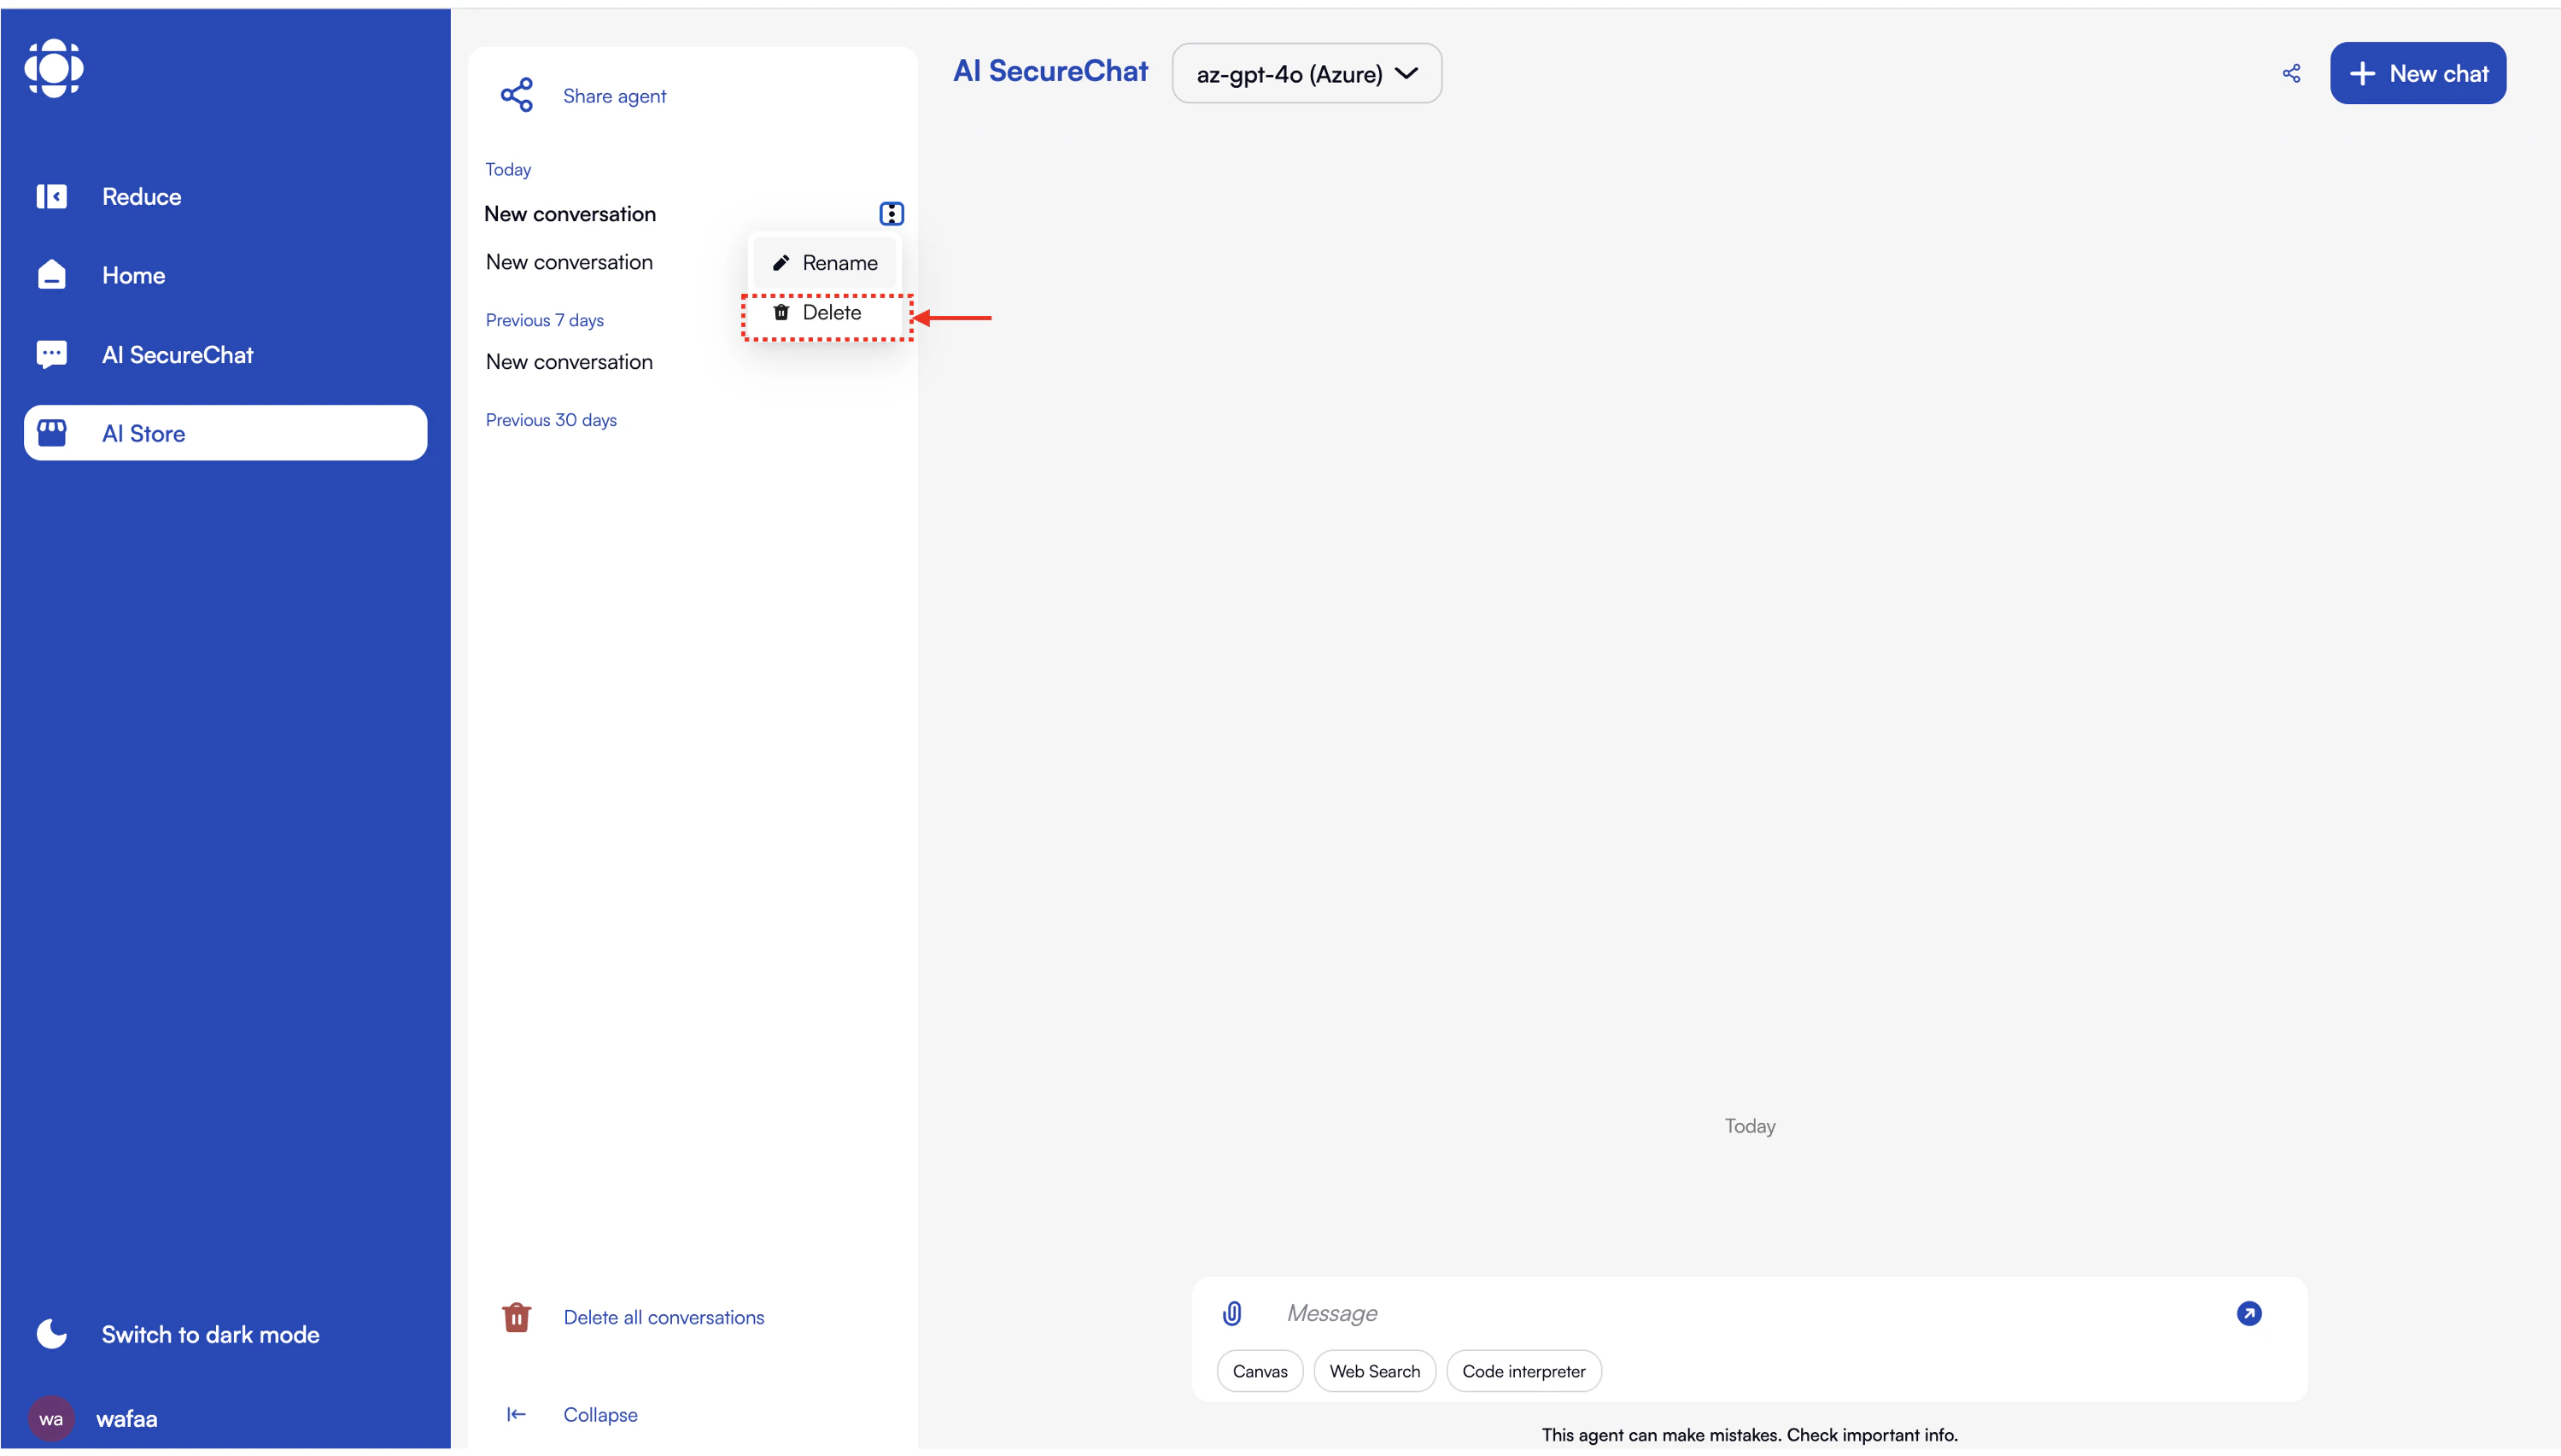
Customizing Your Experience
Personalize Chat to suit your needs:Model Selection
Model Selection
If your organization has multiple AI models available, you can select which one to use: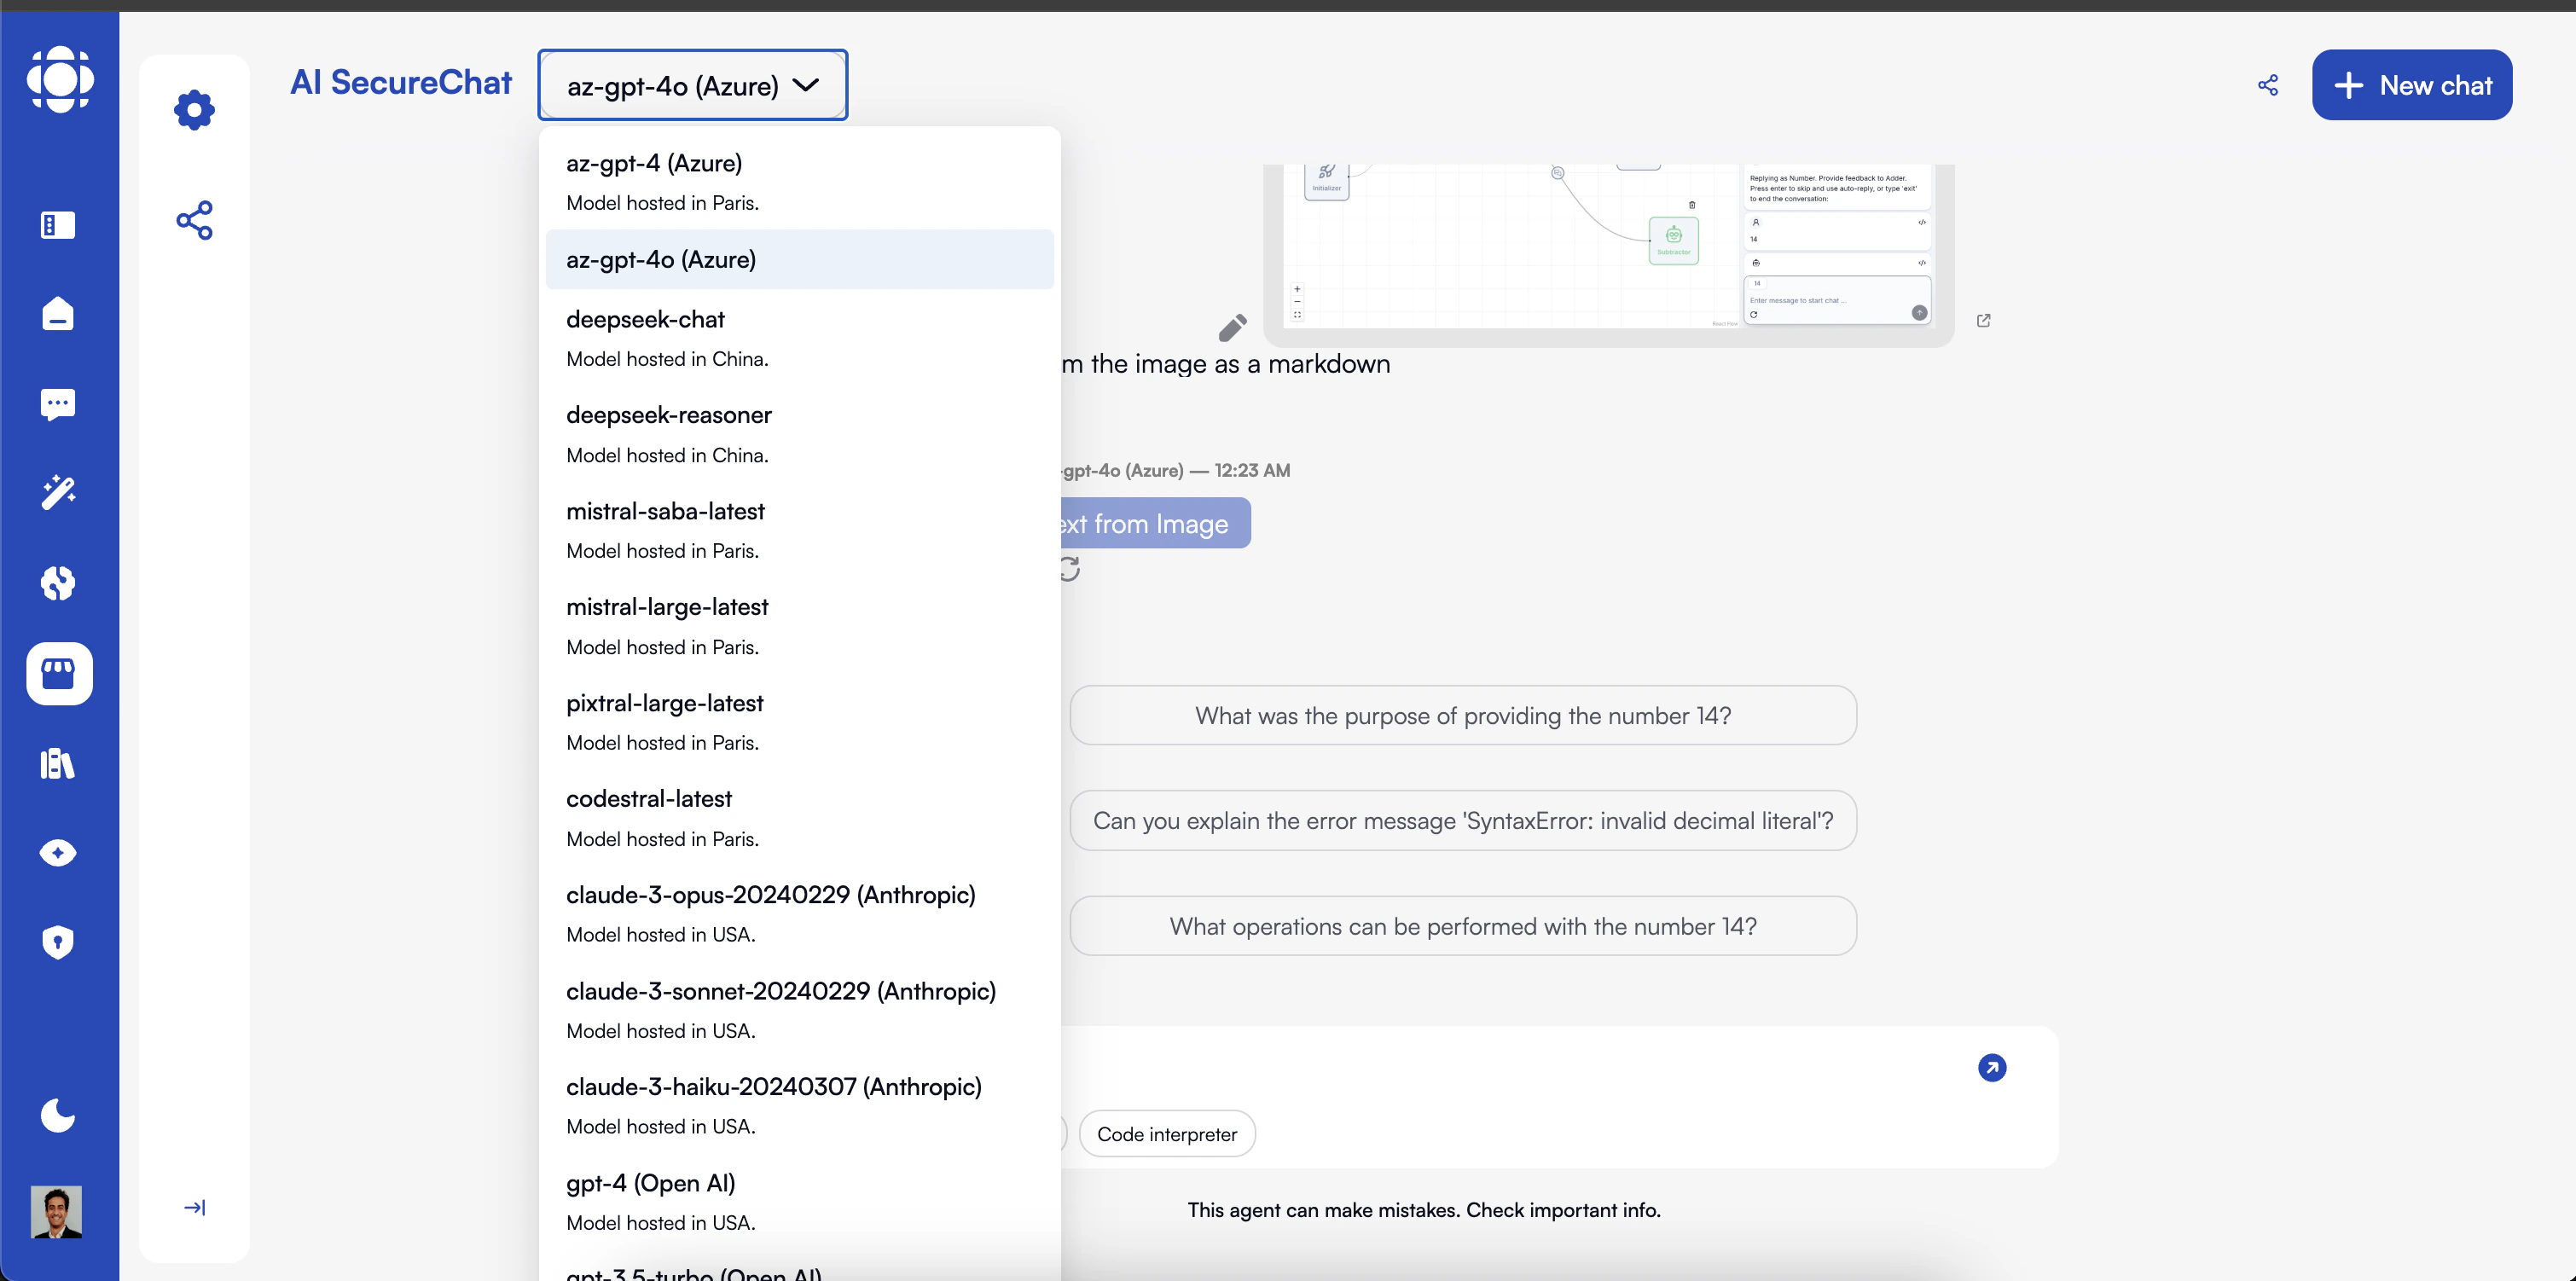
- Click on the model selector in the top right of the interface
- Choose from the available models
Control how and when you share a conversation: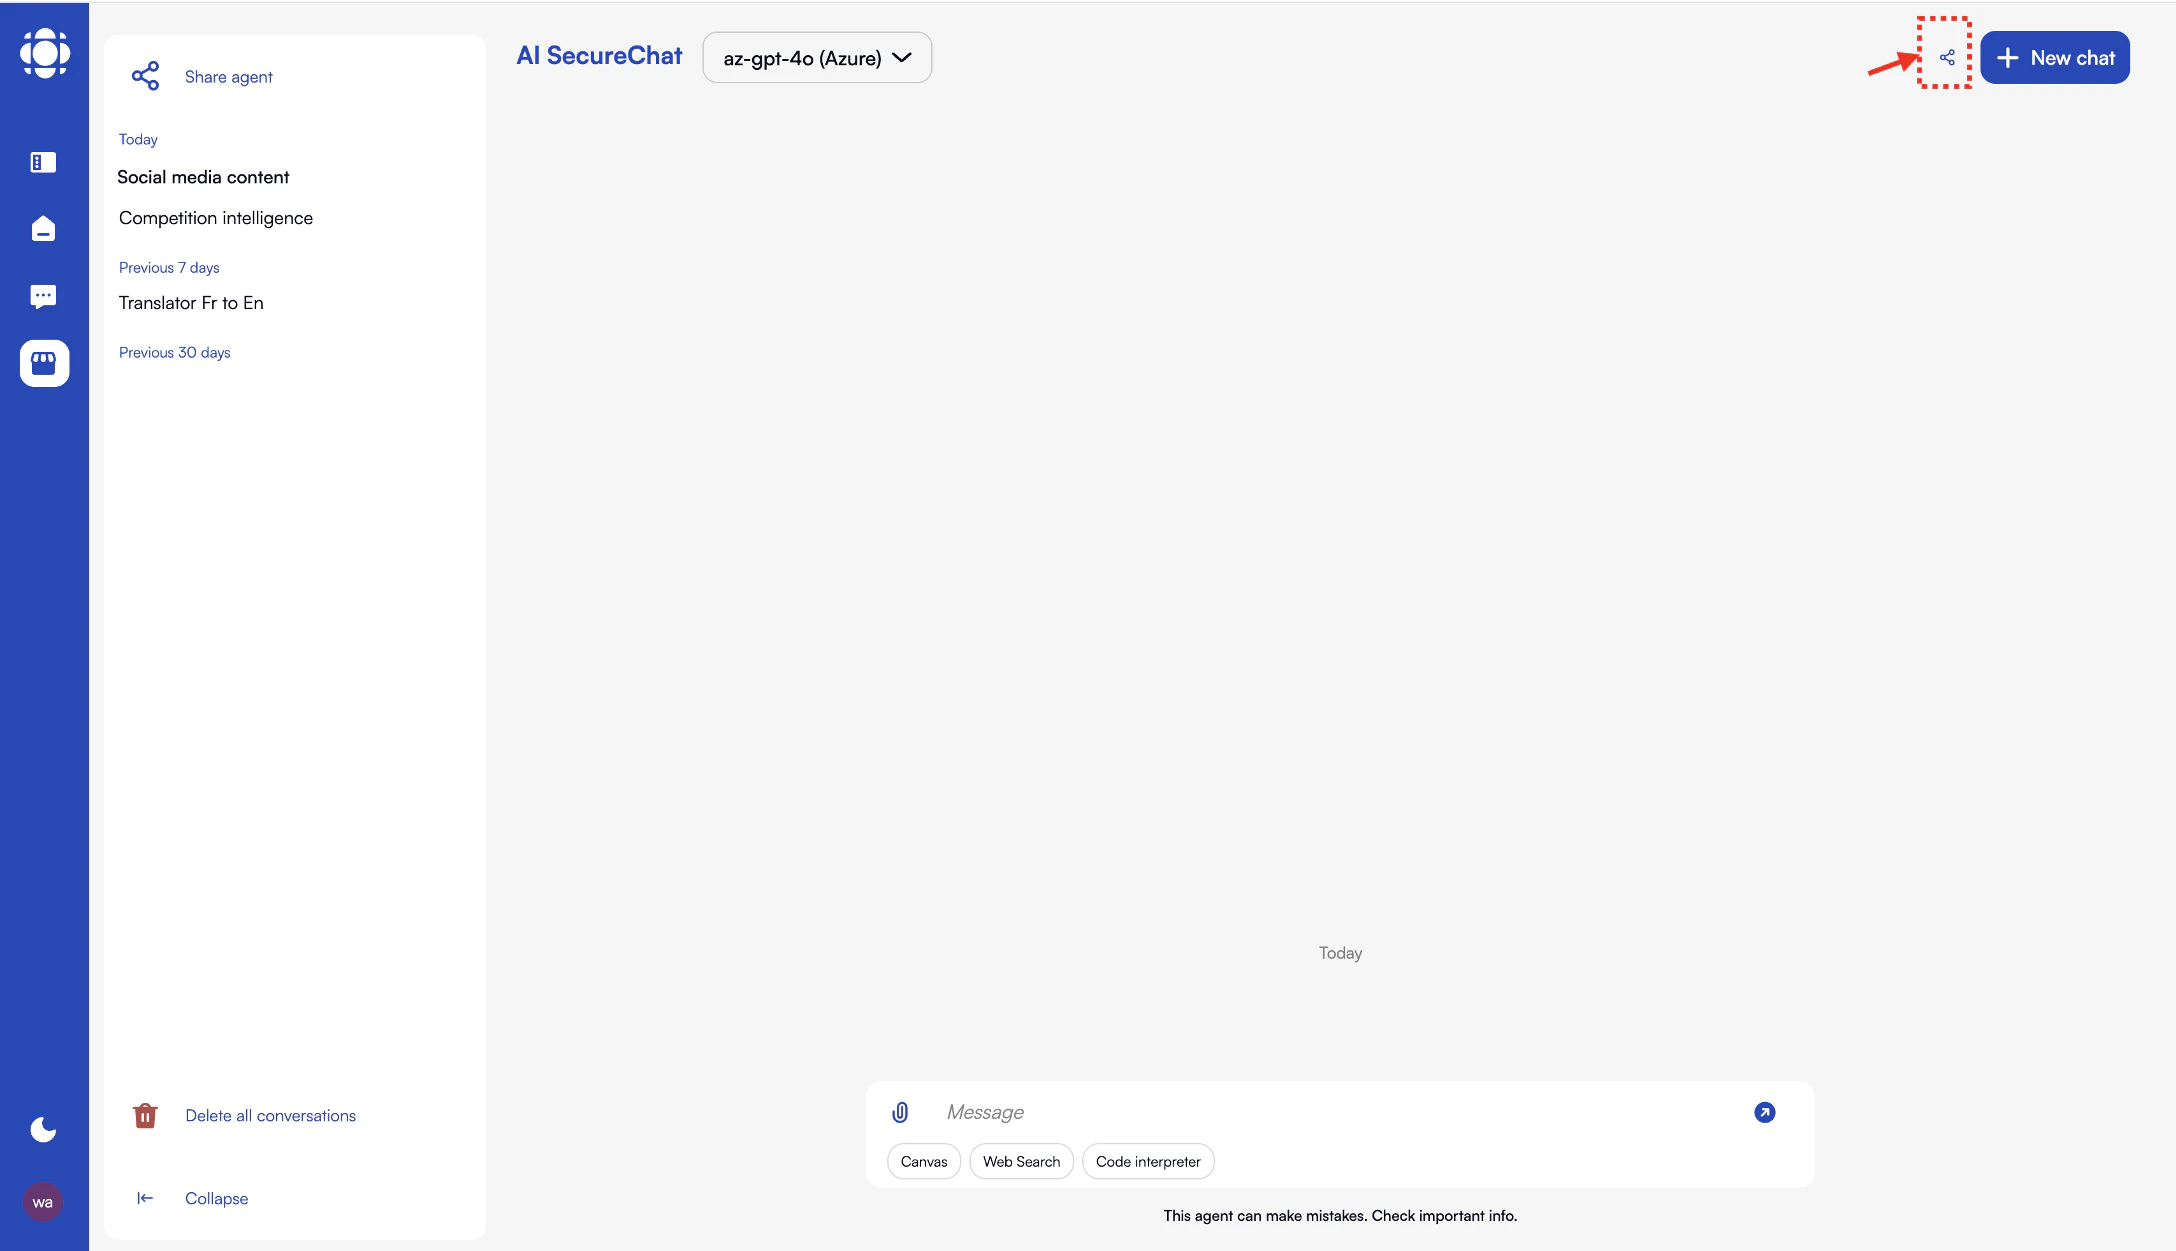
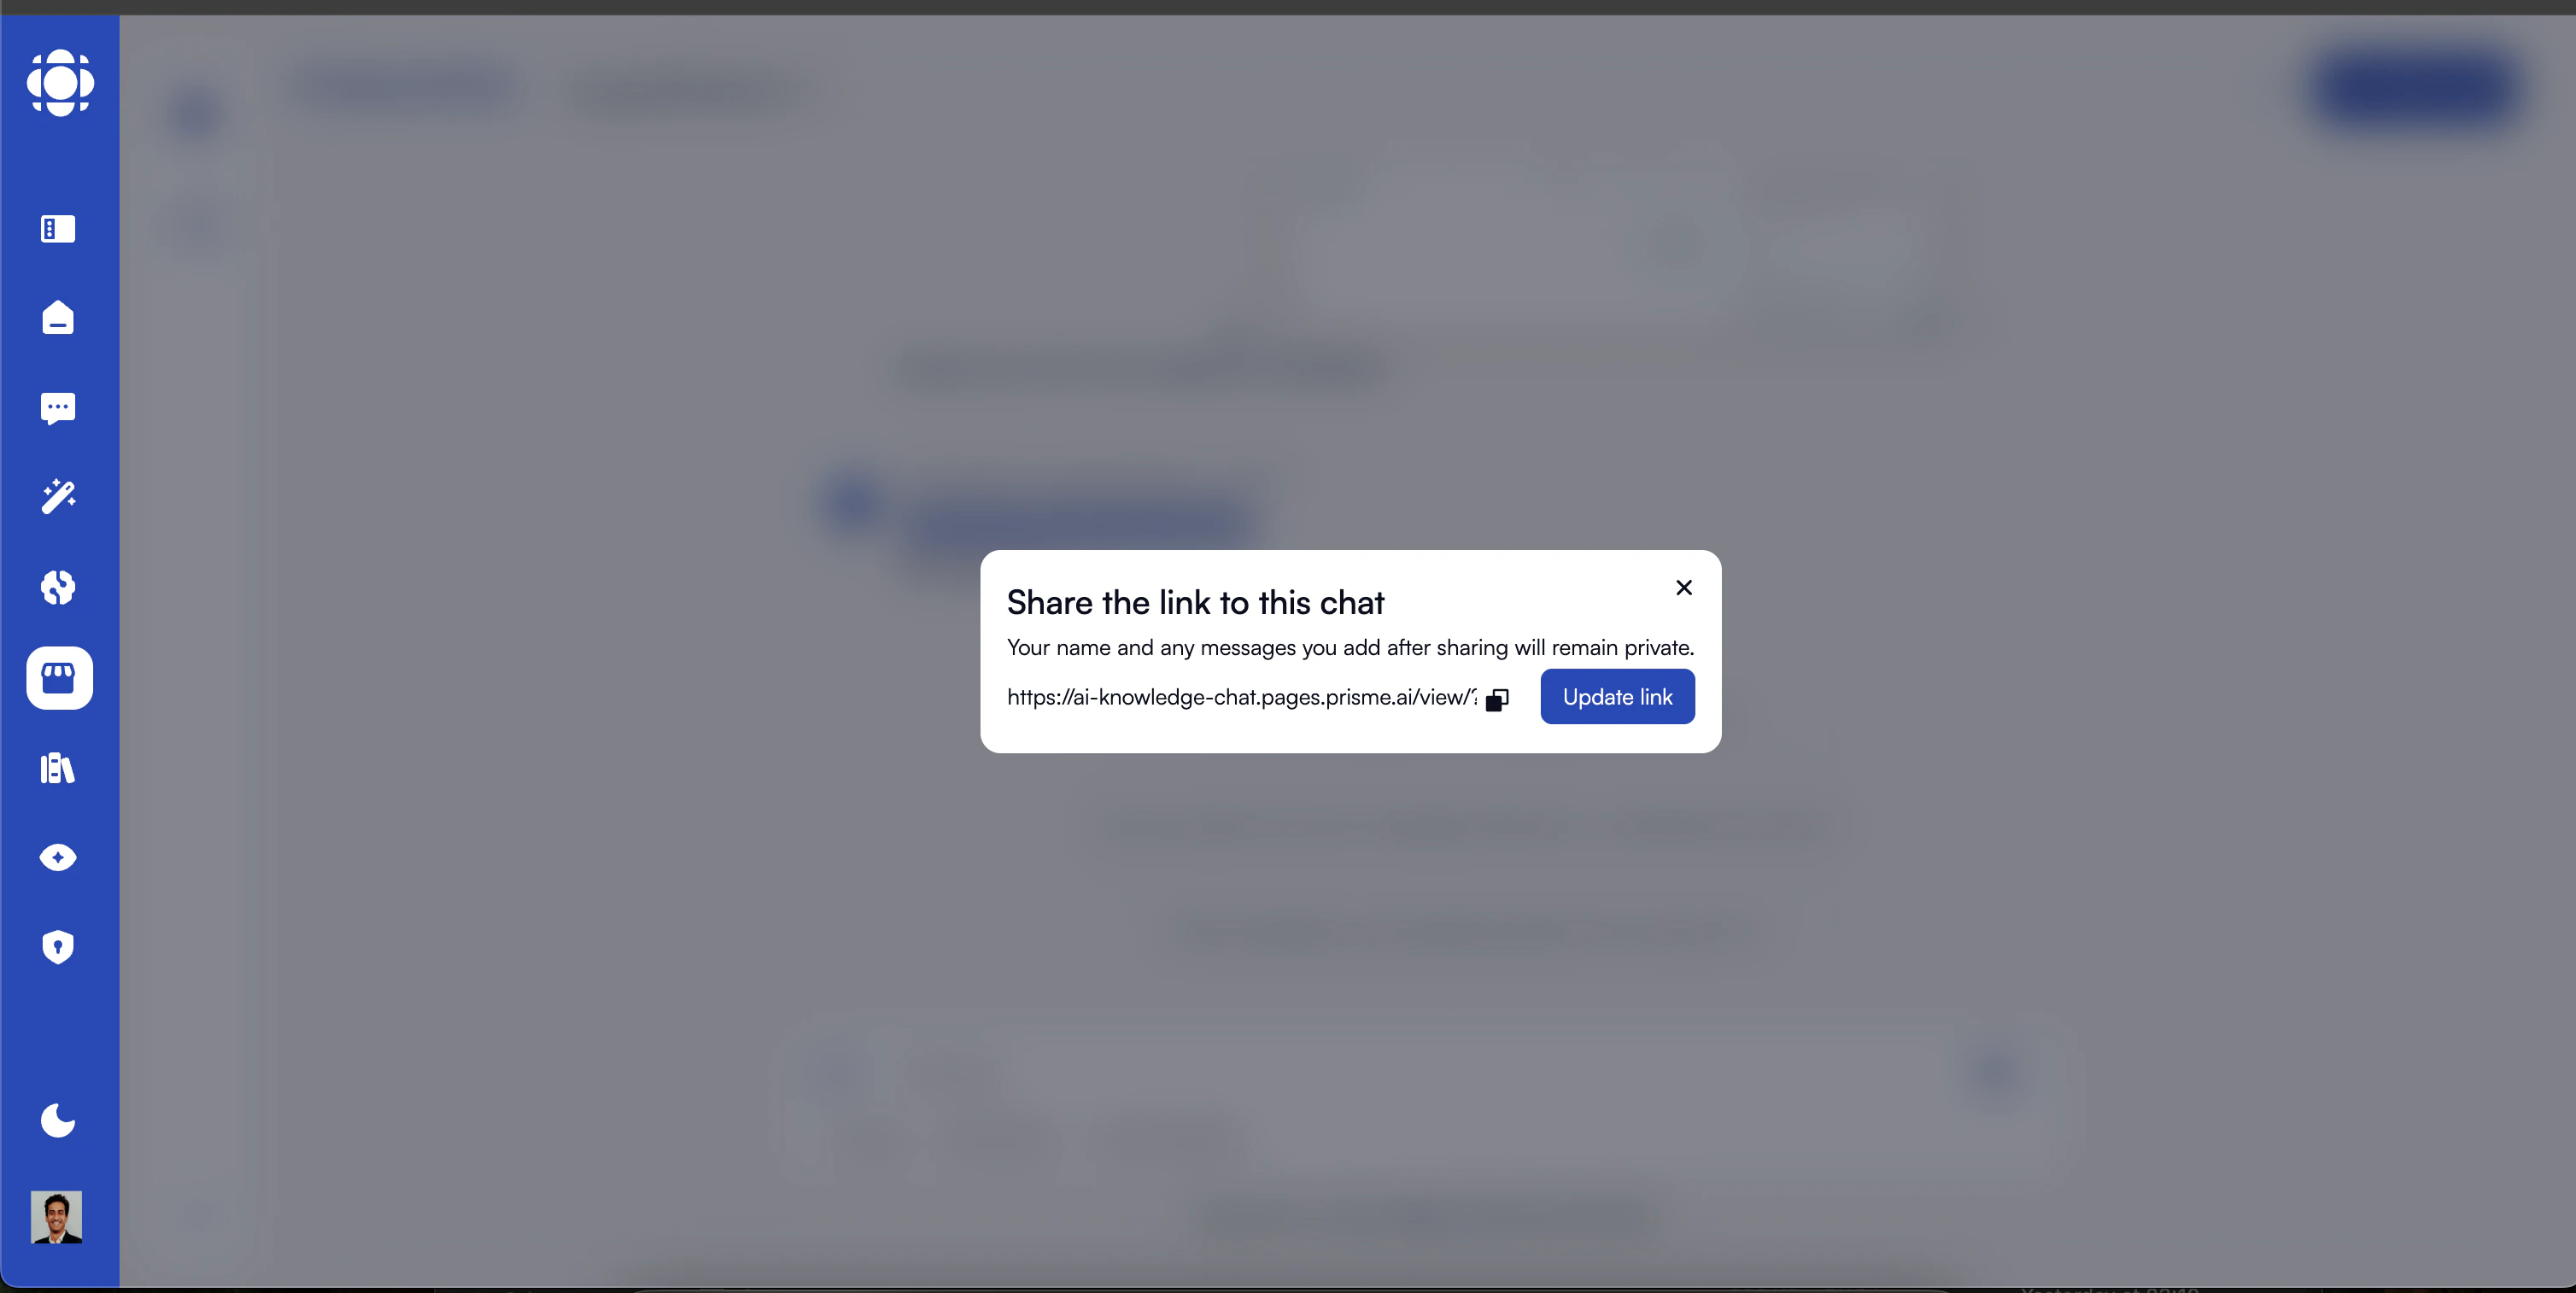
- Click on share icon on the top right of the screen
- Generate a read-only link to your conversation
- Click on copy icon to get the link
- Share the link with your team
Best Practices for Effective Use
Be Specific
Provide clear, detailed instructions or questions to get the best results. The more specific you are, the more useful the response will be.
Iterate
Don’t expect perfect results on the first try. Refine your requests and build on previous responses to get to the desired outcome.
Provide Context
When switching topics, provide sufficient background information to help the AI understand your needs accurately.
Use Formatting
For complex requests, use clear formatting with bullet points, numbering, or sections to structure your instructions.
Verify Information
Always review and verify factual information, especially for critical business decisions.
Respect Sensitive Data
Follow your organization’s guidelines for sharing sensitive information, even though Chat is secure.
Troubleshooting Common Issues
AI response is too long or detailed
AI response is too long or detailed
- Ask for a more concise response
- Specify the desired length or format
- Use phrases like “Summarize in 3 bullet points” or “Keep it under 100 words”
AI response is not relevant to my question
AI response is not relevant to my question
- Rephrase your question with more specific details
- Break complex questions into smaller, clearer parts
- Provide more context about what you’re trying to accomplish
Document processing is taking too long
Document processing is taking too long
- Check that your document is not excessively large (>100 pages)
- Ensure the document format is supported
- Try splitting very large documents into smaller chunks
- Check your network connection
AI keeps referencing outdated information
AI keeps referencing outdated information
- Remember that the AI’s knowledge has a cutoff date
- Provide current information as context in your question
- Upload recent documents if you need analysis of current data
Next Steps
Now that you’ve mastered the basics of Chat, explore these more advanced capabilities:Store
Discover and browse available agents
Document Handling
Learn advanced techniques for working with documents
Conversation Management
Organize and manage your conversations effectively
Canvas
Master the collaborative content creation workspace
Multimodal
Work with images and visual content
Knowledge Bases
Connect to organizational knowledge