Installation
Environment Variable
Before configuring helper agents, you must define the HELPER_AGENT_ENDPOINT environment variable on your instance. This URL should point to the query automation endpoint of the Helper Agents workspace:
Replace XXXXXX with your actual Helper Agents workspace ID.
Workspace Setup
You should find a Workspace named Helper Agents. From Builder, enter into it.
In Automations list, there is a folder named 00_InitAgents with an
automation for each product. Each will create and update an Knowledges agent
which will have role to help the product. Run each one. You now have as many as
new agents in Knowledges home.
After initialization, make sure each agent is configured with a model that is available on your instance. If no image model is available, images will not be generated.
Generate Governe config from Helper Agents Workspace will give to you
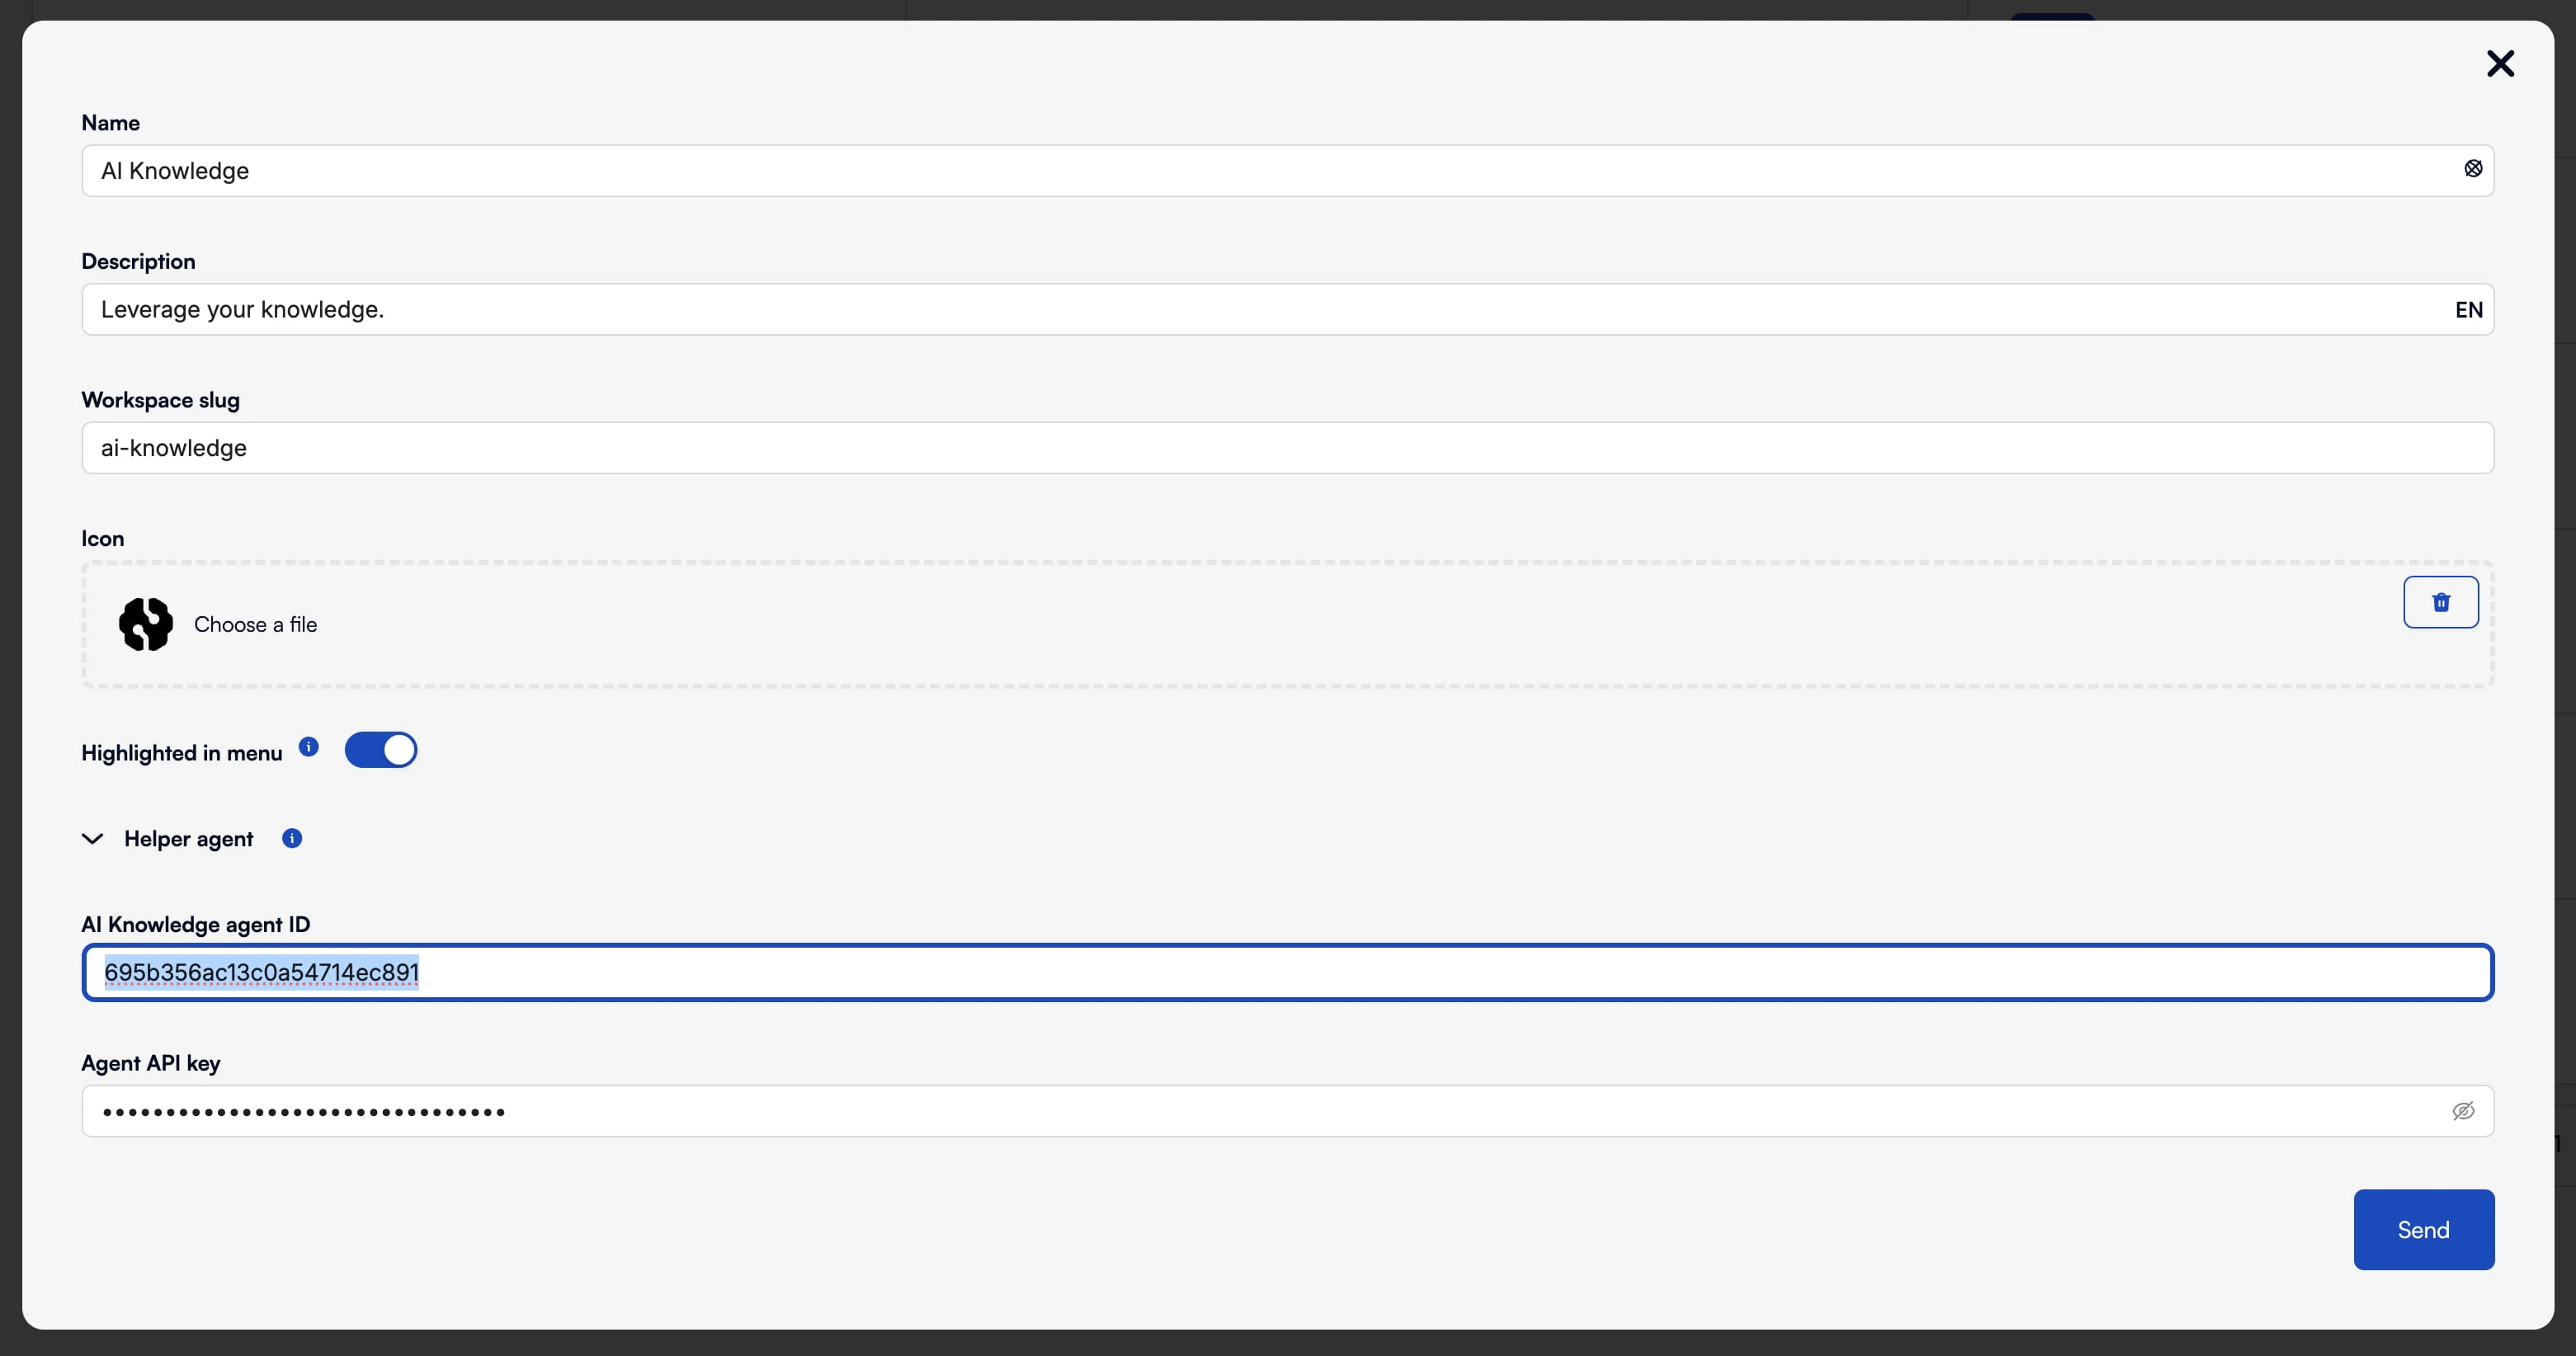
the raw configuration for Governe. You can go to the products section
(STUDIO/en/product/ops-manager/products), edit each product and add the
corresponding ID and API Key from the previous automation.
Alternatively, You can edit the workspace in settings, and paste the object in
the config value.
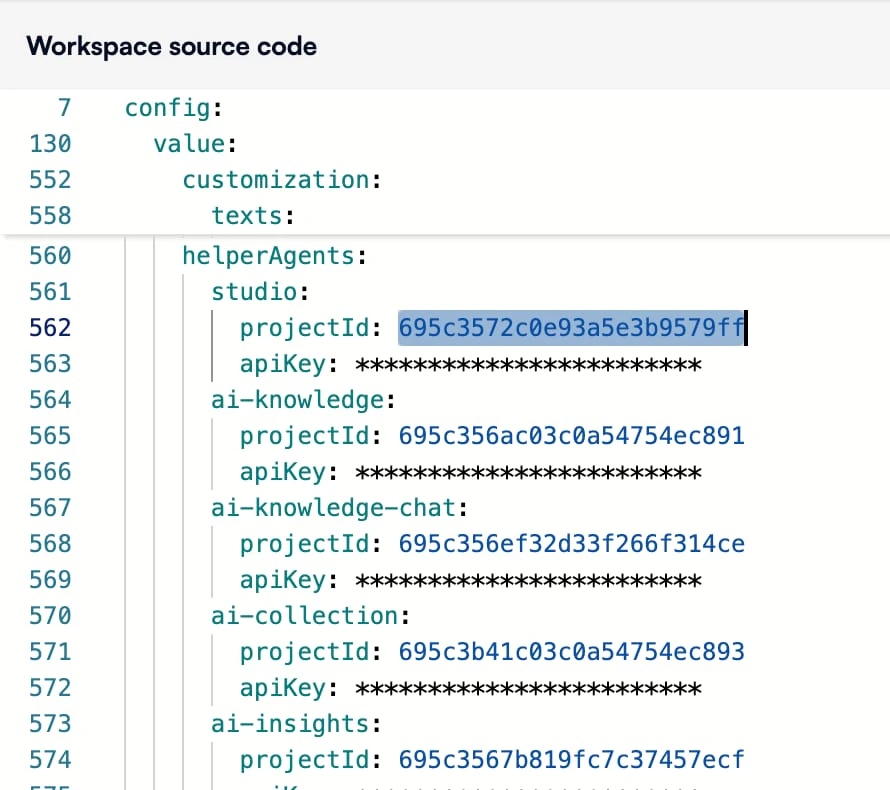
For Builder, the helper agent credentials cannot be configured from the UI. You must add them manually in code view, below the existing credentials, see the first lines (561) from the next picture below.
Update
After each upgrade, it is possible you will need to upgrade this helper agents
by running again all the init automations.
Customization
These agents are optimized for the more common LLM. Maybe they works bad in your
environment and you want to customize yours. Just create a new agent in
Knowledges, and edit it like you want. You can duplicate Helper Agents
Workspace to start with a working template. Finally, just change the id/apikey
in Governe like in Installation section.