> ## Documentation Index
> Fetch the complete documentation index at: https://prismeai-docs-next.mintlify.site/llms.txt
> Use this file to discover all available pages before exploring further.
# Pages
> Build and preview React pages from source files in Builder
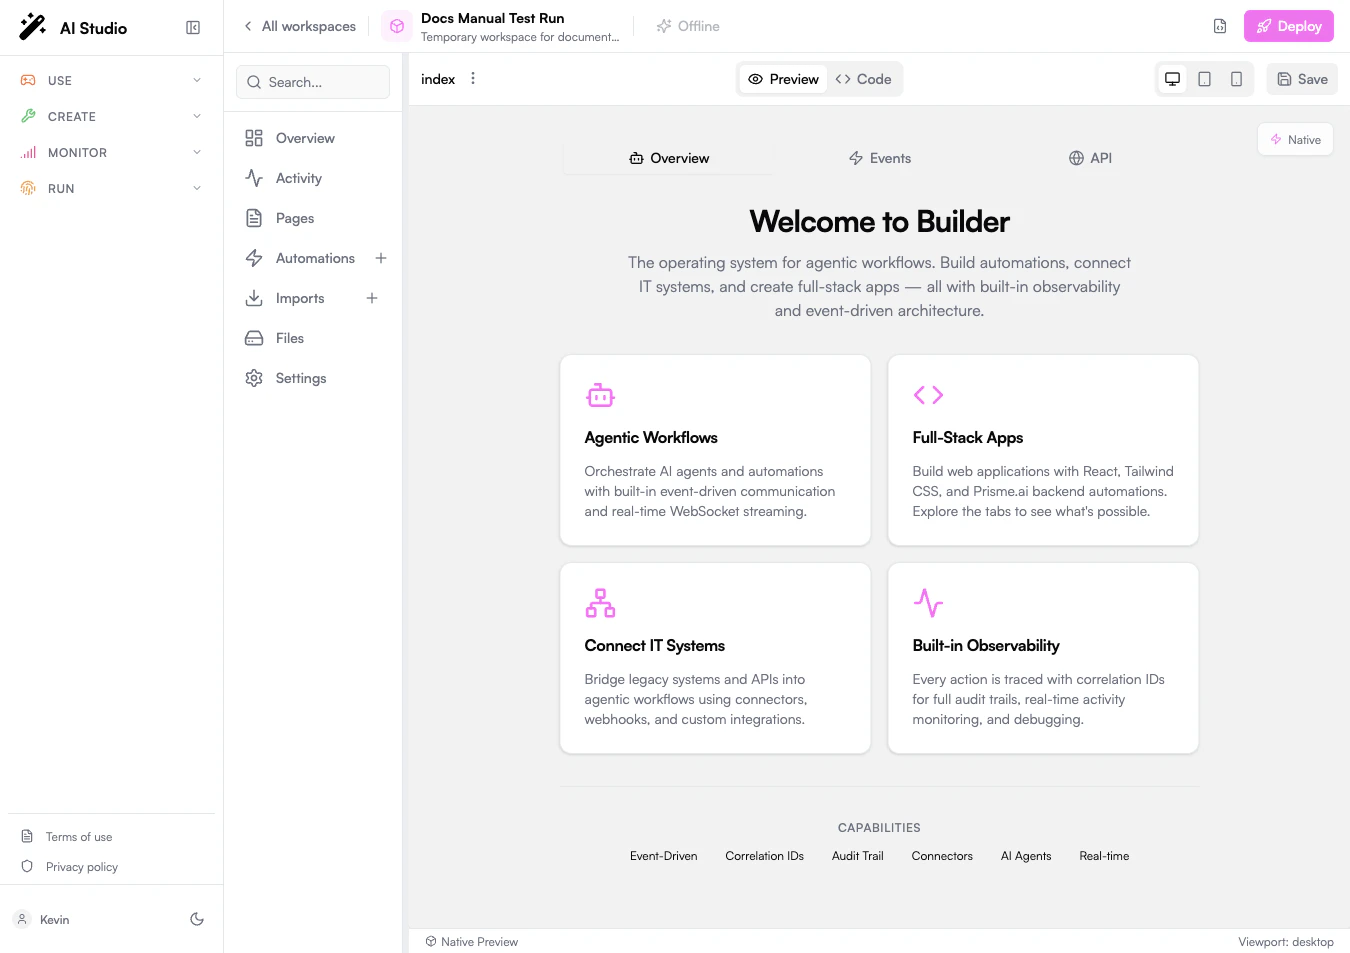 Pages are the frontend part of a Builder workspace. In the current Builder, a page is managed as a React application source tree, not as a block canvas. You edit files, preview the compiled app, and connect the interface to workspace automations through HTTP endpoints, WebSocket events, and the injected Prisme.ai SDK.
Use pages when users need a custom interface around an agent, workflow, internal tool, dashboard, or integration.
## What Changed
The old visual block editor is no longer a Builder navigation item. User interfaces are built from React components and files.
Pages have a source editor and a native preview. Switch between them from the page toolbar.
A new page can initialize a React, Vite, Tailwind CSS, and Radix-based starter application.
Deployed bundles can appear in the Pages list as read-only previews.
## Page Workspace
The Builder layout is organized around the workspace sidebar:
* **Overview** shows usage, recent changes, errors, and quick actions.
* **Activity** shows event traces and correlation IDs.
* **Pages** contains editable source pages and read-only deployed bundles.
* **Automations** contains backend workflows and webhooks.
* **Imports** manages installed apps, custom code, and integration packages.
* **Files** lists uploaded workspace assets.
* **Settings** manages workspace configuration, sharing, secrets, and RBAC.
The editable page currently appears as `index`. It represents the source app that Builder compiles and previews.
## Create a Page
In AI Studio, open **Create** > **Builder**, then select the workspace that should contain the page.
Select **Pages** in the Builder sidebar. If the workspace has no page source yet, click the **+** action or initialize the template from Code mode.
Builder creates a starter React app with files such as:
* `src/App.tsx`
* `src/main.tsx`
* `src/styles/globals.css`
* `index.html`
* `package.json`
* `vite.config.ts`
Switch to **Code** and edit the source files. The file tree supports folders, file selection, file creation, and file rename.
Switch back to **Preview**. Builder compiles the React source and renders it in the native preview area.
Click **Save** when the page works as expected. Saving synchronizes the source files to the workspace.
## Code Mode
Pages are the frontend part of a Builder workspace. In the current Builder, a page is managed as a React application source tree, not as a block canvas. You edit files, preview the compiled app, and connect the interface to workspace automations through HTTP endpoints, WebSocket events, and the injected Prisme.ai SDK.
Use pages when users need a custom interface around an agent, workflow, internal tool, dashboard, or integration.
## What Changed
The old visual block editor is no longer a Builder navigation item. User interfaces are built from React components and files.
Pages have a source editor and a native preview. Switch between them from the page toolbar.
A new page can initialize a React, Vite, Tailwind CSS, and Radix-based starter application.
Deployed bundles can appear in the Pages list as read-only previews.
## Page Workspace
The Builder layout is organized around the workspace sidebar:
* **Overview** shows usage, recent changes, errors, and quick actions.
* **Activity** shows event traces and correlation IDs.
* **Pages** contains editable source pages and read-only deployed bundles.
* **Automations** contains backend workflows and webhooks.
* **Imports** manages installed apps, custom code, and integration packages.
* **Files** lists uploaded workspace assets.
* **Settings** manages workspace configuration, sharing, secrets, and RBAC.
The editable page currently appears as `index`. It represents the source app that Builder compiles and previews.
## Create a Page
In AI Studio, open **Create** > **Builder**, then select the workspace that should contain the page.
Select **Pages** in the Builder sidebar. If the workspace has no page source yet, click the **+** action or initialize the template from Code mode.
Builder creates a starter React app with files such as:
* `src/App.tsx`
* `src/main.tsx`
* `src/styles/globals.css`
* `index.html`
* `package.json`
* `vite.config.ts`
Switch to **Code** and edit the source files. The file tree supports folders, file selection, file creation, and file rename.
Switch back to **Preview**. Builder compiles the React source and renders it in the native preview area.
Click **Save** when the page works as expected. Saving synchronizes the source files to the workspace.
## Code Mode
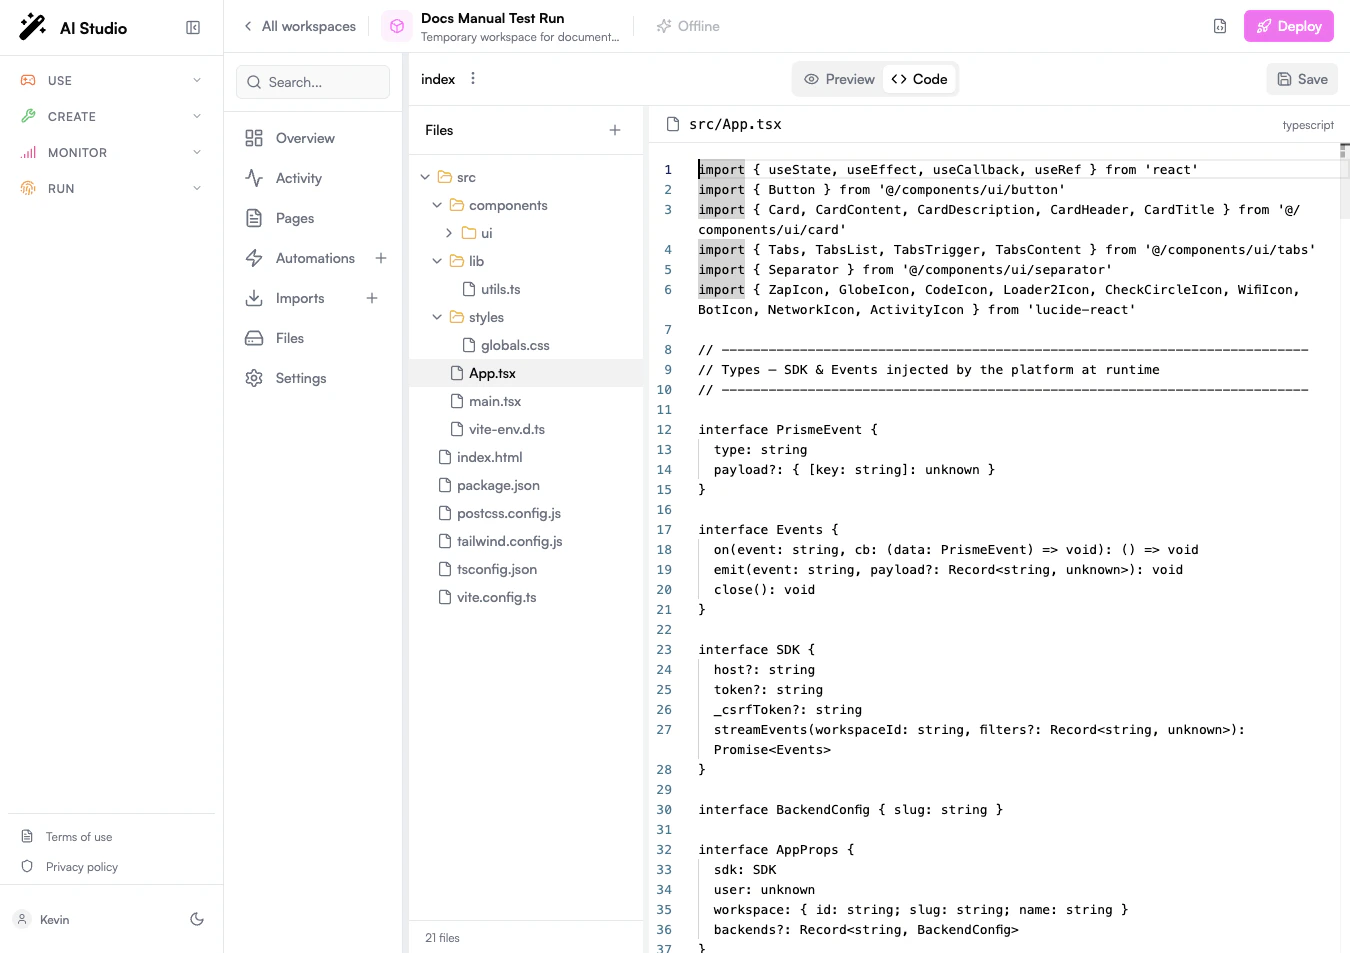 Code mode is where the page source lives. Use it to:
* Edit React and TypeScript files.
* Add reusable components under `src/components`.
* Update global styles under `src/styles`.
* Add utility functions under `src/lib` or `src/hooks`.
* Configure Vite, Tailwind CSS, TypeScript, and package metadata.
Builder tracks unsaved changes and enables **Save** when files have changed.
## Preview Mode
Preview mode compiles the source and renders the page inside Builder. Use the device controls to test:
* **Desktop**
* **Tablet**
* **Mobile**
The preview receives runtime context from the platform:
```tsx theme={null}
interface AppProps {
sdk: SDK
user: unknown
workspace: {
id: string
slug: string
name: string
}
backends?: Record
}
```
Use this context to call workspace webhooks, stream events, and adapt the interface to the current workspace or user.
## Connect to Automations
Pages usually become useful when they call or listen to automations.
Use an automation with an endpoint when the page needs request-response behavior.
```tsx theme={null}
async function runAutomation(sdk: SDK, workspaceSlug: string) {
const response = await fetch(
`${sdk.host}/workspaces/slug:${workspaceSlug}/webhooks/myAutomation`,
{
method: "POST",
headers: {
"Content-Type": "application/json",
...(sdk.token ? { Authorization: `Bearer ${sdk.token}` } : {}),
...(sdk._csrfToken ? { "x-prismeai-csrf-token": sdk._csrfToken } : {}),
},
body: JSON.stringify({ name: "World" }),
}
)
return response.json()
}
```
Use workspace events when the page needs real-time behavior or long-running automation feedback.
```tsx theme={null}
const events = await sdk.streamEvents(workspace.id, {
"source.sessionId": true,
})
events.on("app.greeting.completed", (event) => {
console.log(event.payload)
})
events.emit("app.greeting.requested", { name: "World" })
```
Every automation run and event emission can be inspected from **Activity**. Use the generated correlation ID to follow the full trace from page action to backend execution.
## Deployed Bundles
When a workspace has deployed page bundles, Builder lists them under **Pages** as read-only entries. Read-only pages use a lock icon and cannot be edited from the source editor. Use them to inspect the deployed app while keeping the editable source separate.
To change a deployed page:
1. Open the editable `index` source.
2. Make and save changes.
3. Deploy the workspace again.
4. Reopen the deployed bundle preview.
## Files and Assets
The **Files** section is separate from the page source tree. Use it for uploaded assets that belong to the workspace, such as PDFs, images, spreadsheets, or other binary files.
For app source files, use **Pages** > **Code**. For workspace uploads, use **Files**.
## Troubleshooting
Open **Code** and verify that the workspace has a valid React entry point such as `src/App.tsx` and `src/main.tsx`. If no files exist, initialize the template.
Read the error in the preview, fix the corresponding source file, and return to Preview. Typical causes are invalid imports, missing exports, or TypeScript syntax errors.
Check that the automation endpoint exists, that the URL uses the current workspace slug, and that authentication headers include the platform token and CSRF token when required.
Open **Activity**, filter by the correlation ID, and inspect the automation trace. The request may have reached the backend but failed inside an instruction.
## Next Steps
Build the backend workflows that pages call.
Trace page actions through Activity and correlation IDs.
Connect pages and automations to external systems.
Publish the workspace once the page is ready.
Code mode is where the page source lives. Use it to:
* Edit React and TypeScript files.
* Add reusable components under `src/components`.
* Update global styles under `src/styles`.
* Add utility functions under `src/lib` or `src/hooks`.
* Configure Vite, Tailwind CSS, TypeScript, and package metadata.
Builder tracks unsaved changes and enables **Save** when files have changed.
## Preview Mode
Preview mode compiles the source and renders the page inside Builder. Use the device controls to test:
* **Desktop**
* **Tablet**
* **Mobile**
The preview receives runtime context from the platform:
```tsx theme={null}
interface AppProps {
sdk: SDK
user: unknown
workspace: {
id: string
slug: string
name: string
}
backends?: Record
}
```
Use this context to call workspace webhooks, stream events, and adapt the interface to the current workspace or user.
## Connect to Automations
Pages usually become useful when they call or listen to automations.
Use an automation with an endpoint when the page needs request-response behavior.
```tsx theme={null}
async function runAutomation(sdk: SDK, workspaceSlug: string) {
const response = await fetch(
`${sdk.host}/workspaces/slug:${workspaceSlug}/webhooks/myAutomation`,
{
method: "POST",
headers: {
"Content-Type": "application/json",
...(sdk.token ? { Authorization: `Bearer ${sdk.token}` } : {}),
...(sdk._csrfToken ? { "x-prismeai-csrf-token": sdk._csrfToken } : {}),
},
body: JSON.stringify({ name: "World" }),
}
)
return response.json()
}
```
Use workspace events when the page needs real-time behavior or long-running automation feedback.
```tsx theme={null}
const events = await sdk.streamEvents(workspace.id, {
"source.sessionId": true,
})
events.on("app.greeting.completed", (event) => {
console.log(event.payload)
})
events.emit("app.greeting.requested", { name: "World" })
```
Every automation run and event emission can be inspected from **Activity**. Use the generated correlation ID to follow the full trace from page action to backend execution.
## Deployed Bundles
When a workspace has deployed page bundles, Builder lists them under **Pages** as read-only entries. Read-only pages use a lock icon and cannot be edited from the source editor. Use them to inspect the deployed app while keeping the editable source separate.
To change a deployed page:
1. Open the editable `index` source.
2. Make and save changes.
3. Deploy the workspace again.
4. Reopen the deployed bundle preview.
## Files and Assets
The **Files** section is separate from the page source tree. Use it for uploaded assets that belong to the workspace, such as PDFs, images, spreadsheets, or other binary files.
For app source files, use **Pages** > **Code**. For workspace uploads, use **Files**.
## Troubleshooting
Open **Code** and verify that the workspace has a valid React entry point such as `src/App.tsx` and `src/main.tsx`. If no files exist, initialize the template.
Read the error in the preview, fix the corresponding source file, and return to Preview. Typical causes are invalid imports, missing exports, or TypeScript syntax errors.
Check that the automation endpoint exists, that the URL uses the current workspace slug, and that authentication headers include the platform token and CSRF token when required.
Open **Activity**, filter by the correlation ID, and inspect the automation trace. The request may have reached the backend but failed inside an instruction.
## Next Steps
Build the backend workflows that pages call.
Trace page actions through Activity and correlation IDs.
Connect pages and automations to external systems.
Publish the workspace once the page is ready.